Difference between revisions of "Time lapse stabilization"
m (→post processing: Fixed shell code) |
|||
| (19 intermediate revisions by 5 users not shown) | |||
| Line 36: | Line 36: | ||
mkdir small | mkdir small | ||
for i in *.jpg; do | for i in *.jpg; do | ||
| − | echo "$i " | + | echo "$i" |
| − | djpeg $i | pnmscale 0.25 | cjpeg > small/$i | + | djpeg "$i" | pnmscale 0.25 | cjpeg > small/"$i" |
done | done | ||
cd small | cd small | ||
| + | |||
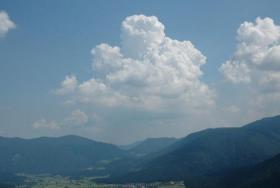
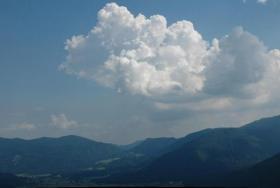
| + | Two of my images (Scaled to 0.4 of what I worked with): | ||
| + | |||
| + | [[image:Timelapse_pre1.jpg]] [[image:Timelapse_pre2.jpg]] | ||
=== Steps in hugin === | === Steps in hugin === | ||
| Line 58: | Line 62: | ||
several controlpoint matches on images 0 against image 2. | several controlpoint matches on images 0 against image 2. | ||
| − | + | Configure the project to produce only the individual remapped images; | |
| − | the " | + | if the output's filename has been set to "test.tif", then the remapped |
| − | + | image files will be named something like "test????.tif" (where the "????" | |
| − | for | + | represents some number). |
| + | |||
| + | === post processing === | ||
| + | |||
| + | You can convert the remapped images to JPEGs with: | ||
| + | |||
| + | for i in test????.tif; do | ||
| + | tifftopnm "$i" | cjpeg > "$i".jpg | ||
| + | done | ||
| − | + | now you can play them with: | |
| − | + | mplayer -mf fps=12 mf://\test\*.tif.jpg | |
| − | |||
| − | |||
| − | + | The bouncing should be greatly reduced! | |
| − | |||
| − | + | Here are two of the resulting images. | |
| − | |||
| − | |||
| − | |||
| − | |||
| − | + | [[image:Timelapse_post1.jpg]] [[image:Timelapse_post2.jpg]] | |
| − | + | Next, you can trim off some of the bouncy edges. I used pnmcut while | |
| − | + | the files are in PPM format in the last conversion: | |
| − | |||
| − | |||
| − | for i in test????.tif ; do | + | for i in test????.tif; do |
| − | tifftopnm $i | cjpeg > $i.jpg | + | tifftopnm "$i" | pnmcut -top 120 -left 50 -right -60 -bot -120 | cjpeg > "$i".jpg |
done | done | ||
| − | + | And after trimming: | |
| + | |||
| + | [[image:Timelapse_tpost1.jpg]] [[image:Timelapse_tpost2.jpg]] | ||
| + | |||
| + | I then encoded the sequence of frames using: | ||
| + | |||
| + | mencoder -mf fps=12 mf://test\*.tif.jpg -ovc lavc -lavcopts vcodec=mpeg4 -o timelapse_final.avi | ||
| − | |||
| − | + | And here is the final 160 frame avi file: http://prive.bitwizard.nl/timelapse_final.avi | |
=== final words === | === final words === | ||
| − | |||
| − | |||
| − | |||
| − | |||
| − | |||
The inline scripts in this page are written in "bash". If you use tcsh, | The inline scripts in this page are written in "bash". If you use tcsh, | ||
| Line 106: | Line 109: | ||
how you achieve such operations. | how you achieve such operations. | ||
| − | This | + | This tutoral was written by R.E.Wolff@BitWizard.nl . Feel free to Email me |
| − | + | with suggestions or ways to do this easier. As this is a WIKI you could | |
| + | also edit this directly. | ||
| − | + | In newer versions of hugin, an application "align_image_stack" is available. | |
| − | + | This is not yet released, but a windows application executable is available. | |
| − | + | Unix users will have to get and compile from the subversion source. | |
| − | |||
| − | |||
| − | |||
| − | |||
| − | |||
| − | |||
| − | + | I tried it, and found that the results of "align_image_stack" are worse than | |
| − | + | what I started with. My test case had lots of clouds, and it apparently was | |
| − | + | finding points on the clouds instead of on the mountains that remain stable. | |
| − | + | === Other Examples === | |
| − | + | [http://imgur.com/a/3qfWQ TheodoreFunkenstein tutorial of stabilizing a movie clip] | |
| − | + | ||
| + | [[Category:Tutorial:Specialised]] | ||
Latest revision as of 22:08, 3 June 2014
Time Lapse stabilization
Remember the shaky videos of rockets being launched from the old days?
Did you see the modern NASA videos , where the FRAME bounces around the object being filmed, while the rocket remains perfectly stable in view? Thats' what you'll be able to do after reading this tutorial.
Why and when?
Sometimes you find yourselves with some time on your hand, a nice camera, a nice scene that would look nice in a time lapse movie, but no tripod and/or computer to take shots in exactly the same position in an exact time-sequence.
Just point the camera at what you want in your timelapse, and take shots, at regular intervals, as consistent in time delay and direction as you want/can.
You can play a sequence of jpgs using mplayer with:
mplayer -mf fps=12 mf://\*.jpg
If you put the shots together like this the image will bounce and shake a lot, because you didn't point the camera in exactly the same direction every time.... This is where tripods excel above humans.
So, hugin to the rescue!
preparing the images
First, I reduced the size of all the jpgs by a factor of 4 in each direction. This gave me frames of about video quality, greatly reducing the amount of CPU time required to process the many images.
 mkdir small
 for i in *.jpg; do
     echo "$i"
     djpeg "$i" | pnmscale 0.25 | cjpeg > small/"$i"
 done
 cd small
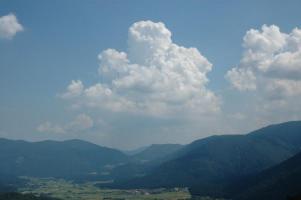
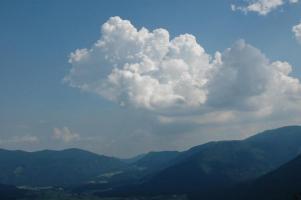
Two of my images (Scaled to 0.4 of what I worked with):
Steps in hugin
I then started up hugin and loaded all the images.
Now to match all the images I have to do the control points manually, because this is not the "normal" use of hugin. However, for someone intimate with the workings of Hugin and the surrounding tools, it should be quite possible to modify one of the tools to allow doing this automatically in the future.
On the control-points tab, select image 0 on the left, and image 1 on the right. Now match two or three points in the image.
Next, you would normally match image 1 to image 2, and so on. In this case I recommend you match every image to image 0. So next you create several controlpoint matches on images 0 against image 2.
Configure the project to produce only the individual remapped images; if the output's filename has been set to "test.tif", then the remapped image files will be named something like "test????.tif" (where the "????" represents some number).
post processing
You can convert the remapped images to JPEGs with:
   for i in test????.tif; do
      tifftopnm "$i" | cjpeg > "$i".jpg
   done
now you can play them with:
mplayer -mf fps=12 mf://\test\*.tif.jpg
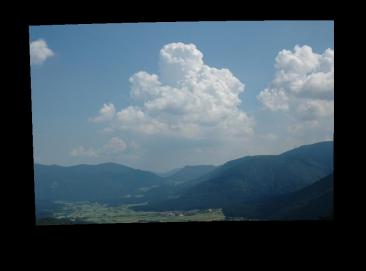
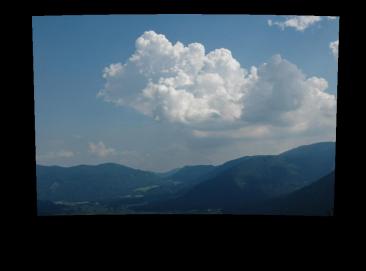
The bouncing should be greatly reduced!
Here are two of the resulting images.
Next, you can trim off some of the bouncy edges. I used pnmcut while the files are in PPM format in the last conversion:
   for i in test????.tif; do
      tifftopnm "$i" | pnmcut -top 120 -left 50 -right -60 -bot -120 | cjpeg > "$i".jpg
   done
And after trimming:
I then encoded the sequence of frames using:
mencoder -mf fps=12 mf://test\*.tif.jpg -ovc lavc -lavcopts vcodec=mpeg4 -o timelapse_final.avi
And here is the final 160 frame avi file: http://prive.bitwizard.nl/timelapse_final.avi
final words
The inline scripts in this page are written in "bash". If you use tcsh, the syntax is slightly different. If you're on MS Windows, I don't know how you achieve such operations.
This tutoral was written by R.E.Wolff@BitWizard.nl . Feel free to Email me with suggestions or ways to do this easier. As this is a WIKI you could also edit this directly.
In newer versions of hugin, an application "align_image_stack" is available. This is not yet released, but a windows application executable is available. Unix users will have to get and compile from the subversion source.
I tried it, and found that the results of "align_image_stack" are worse than what I started with. My test case had lots of clouds, and it apparently was finding points on the clouds instead of on the mountains that remain stable.
