Mending parallax errors with the shear tool
Shooting panoramas hand-held is a useful technique, but a major drawback is parallax error when assembling later. This tutorial shows how to use the shear tool in your image manipulation program to retouch these errors invisibly.
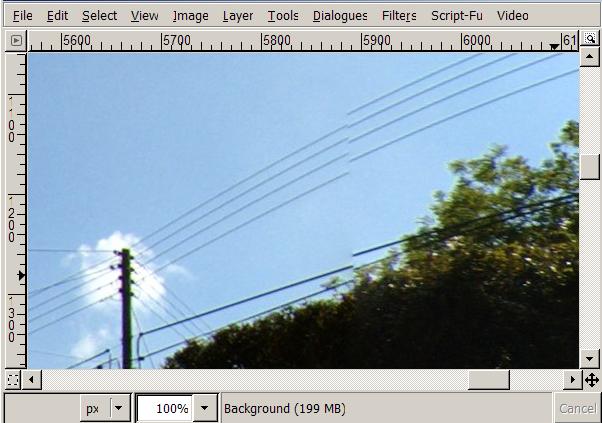
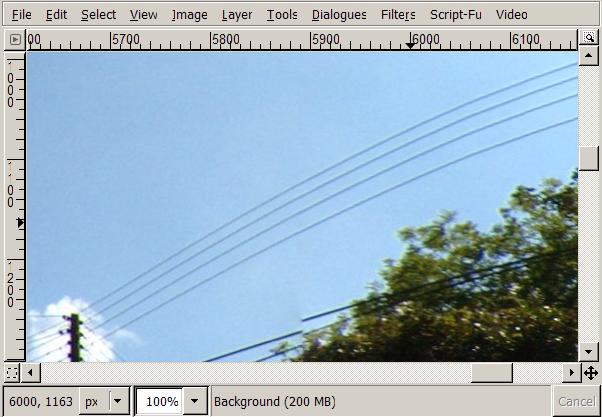
Here is a portion of a stitched equirectangular panorama, you can see that there are extreme parallax problems with the overhead wires.
A common retouching technique is to select the wires and rotate them until they line up, but this is problematic for two reasons:
- Rotation has to be done by eye using trial and error.
- Parallax errors are actually closer to a shear transformation than a rotation.
By using the shear tool instead of the rotate tool, it is possible to correct the error exactly, first time every time.
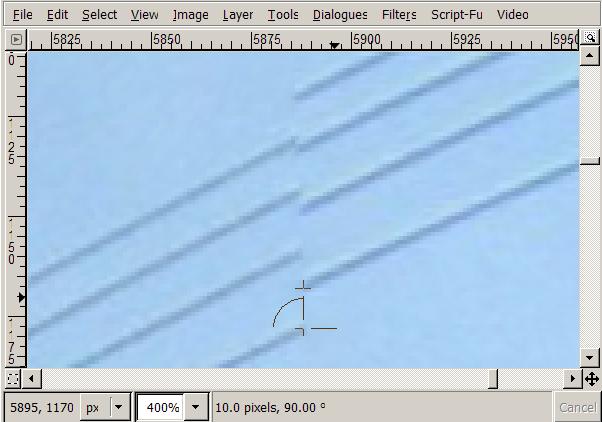
Start by measuring the horizontal or vertical difference of the fault, in this case it is ten pixels.
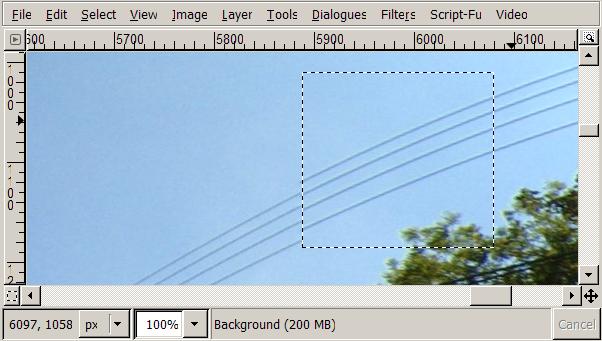
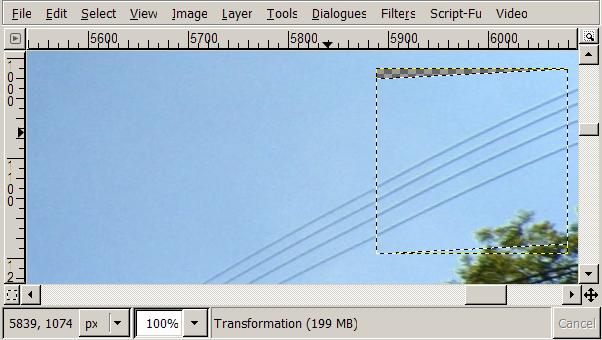
Now select as much as you can on one side of the fault with the rectangular selection tool.
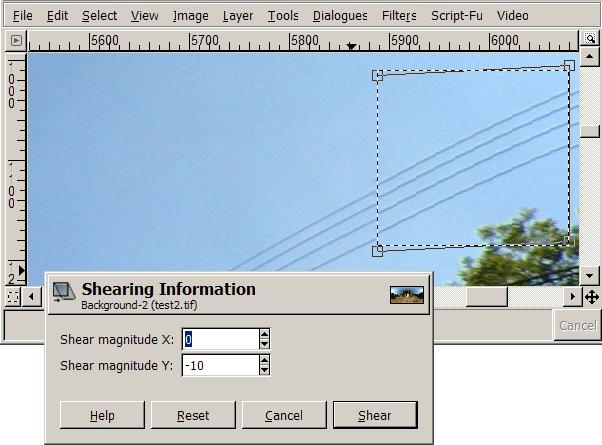
Using the shear tool, shear the selection by ten pixels vertically, to be precise you can enter this number using the keyboard.
Finally, use the move tool to move the selection vertically by half of the shear amount (ie. five pixels). In GIMP you can nudge the selection five pixels by hitting an arrow key five times. Now the selected area lines-up perfectly without any trial and error.
Here is the image after cleaning up with the resynthesizer tool (cleanup could also be done manually with the clone tool for similar results).
Notes
The move tool only works in pixel increments, this limits the shear value to even numbers (2, 4, 6, 8, etc...). So if you find that the error you need to fix is an odd number such as eleven, then simply scale the image 200% and work on this instead.
For better results, perform the operation twice, once on each side of the fault. For example the final image above was actually sheared by four pixels on the left side of the fault and by six pixels on the right.
This tutorial was assembled using GIMP, but probably something similar can be achieved with other software such as Photoshop.
