Difference between revisions of "How to remove blending error caused by enblend and enfuse at zenith and nadir (automatic)"
MilanKnizek (talk | contribs) (Created page with 'Enblend (and enfuse; both used by hugin) does not blend properly the zenith and nadir vertices yet. There is a Blueprint (idea description) on Launchpad ([https://blueprints.laun...') |
Erik Krause (talk | contribs) m (categorized) |
||
| Line 201: | Line 201: | ||
echo "Running \"rm tmp_x_*\" will delete all files created by $0 script." | echo "Running \"rm tmp_x_*\" will delete all files created by $0 script." | ||
</source> | </source> | ||
| + | |||
| + | [[Category:Tutorial:Specialised]] | ||
| + | [[Category:Software:Hugin]] | ||
Latest revision as of 16:14, 25 May 2017
Enblend (and enfuse; both used by hugin) does not blend properly the zenith and nadir vertices yet. There is a Blueprint (idea description) on Launchpad ([1]) describing the problem and potential solutions.
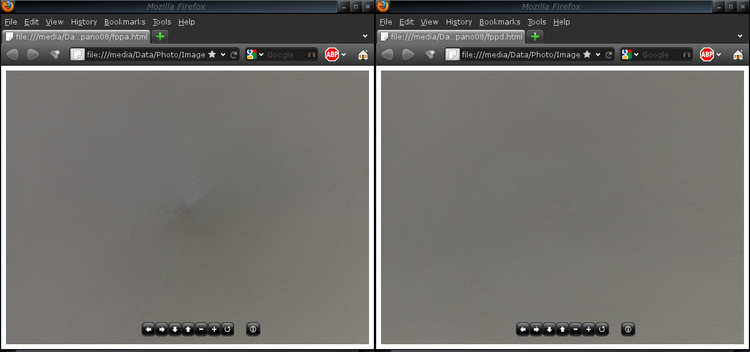
The left image shows the blending error at zenith (a ceiling), the right image is a result of the tutorial described below.
NB: This tutorial does not help with stitching errors.
Short summary
This tutorial consists of the following steps:
- a) create a regular levelled panorama in equirectangular projection (where zenith is the top and nadir is the bottom edge of the image). Let's call it "pano08_a". When viewed with sphere viewer, this image may show blending error.
- b) re-project the zenith and nadir to the middle of output image in equirectangular projection ("pano08_b").
- c) re-project the image_b from prior step to a levelled panorama in equirectangular projection ("pano08_c" - it looks now the same like the image_a, but zenith and nadir show less or no blending errors)
- d) blend together images from steps A and C, while the potentially erroneous areas are masked.
At the end of the tutorial, there is a bash script fully automating the process.
(A) Original panorama
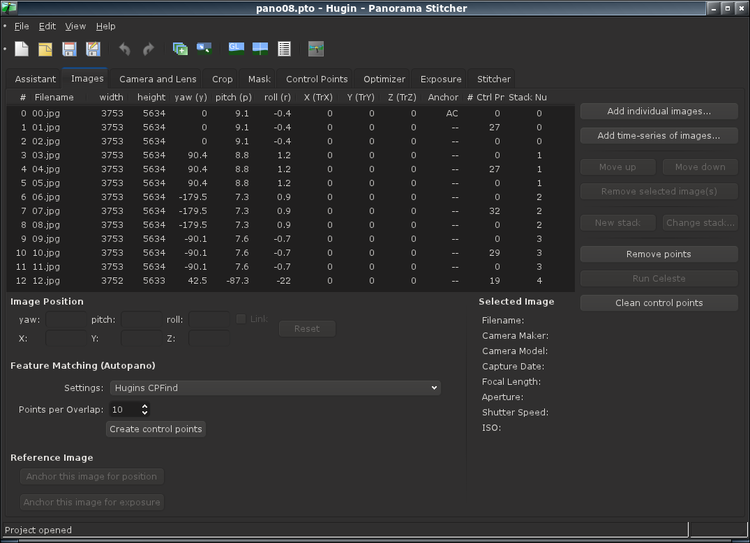
Prepare a hugin project, which provides a ready to use panorama image in equirectangular projection. Let's call it pano08.pto. This one consists of total 13 fisheye images, out of which 12 are made of 3 exposure bracketed series plus a separate nadir shot taken without a tripod.
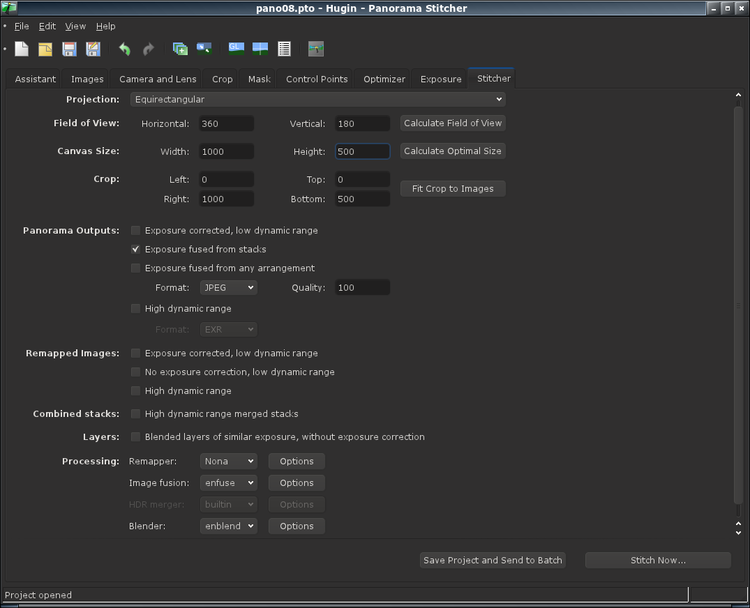
Run the stitcher and save the image with prefix "pano08_a". (Note that the exposure fusion is chosen to handle the exposure stacks. As a result, the output "pano08_a" gets suffixed with "_fused.jpg".)
(B) Distorted panorama
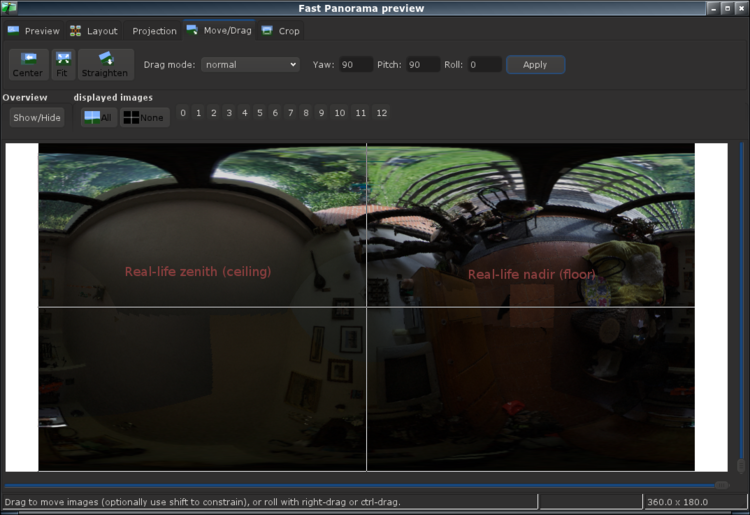
Make a copy of the original pano08.pto file (copy & paste in file manager or using Save As in hugin) and name it pano08_b.pto. Open the project in hugin, open the GL preview and on the tab "Move/Drag" set Yaw = 90, Pitch = 90, Roll = 0 and click "Apply" once. The displayed image should get distorted so that the real-life nadir and zenith moved to the middle of the image.
Return to hugin's main window and stitch the panorama with prefix "pano08_b".
(C) The distortion reverted
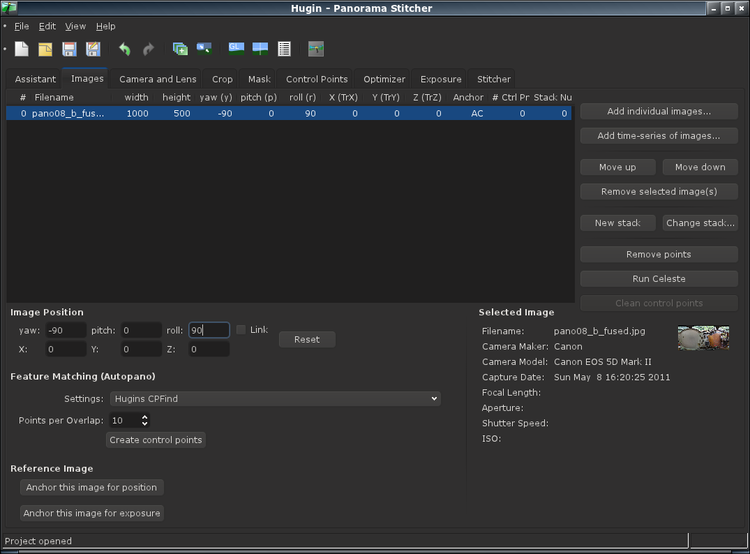
Create a new hugin project and load the image "pano08_b_fused.jpg" as the single input image. The lens type is equirectangular, HFOV is 360°. It is better to add the images manually on the tab "Image" to skip the wizzard. Set Yaw = -90, Pitch = 0, Roll = 90 - this will reverse the distortion done in step B.
Make sure the Canvas Size is the same like in step A and stitch the panorama with prefix "pano08_c".
(D) Blend images from steps A and C
Create a new hugin project and add the images "pano08_a_fused.jpg" and "pano08_c.jpg" manually in the "Image" tab. Set the lens type to equirectangular and HFOV 360°.
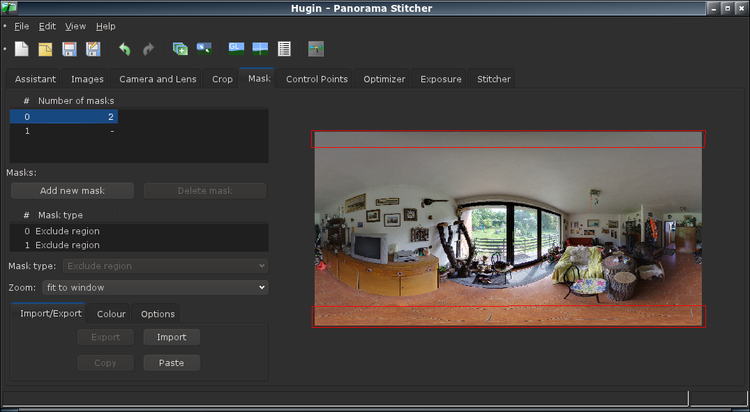
Now create a mask for image "pano08_a_fused.jpg" so that the top and bottom parts are excluded for stitching:
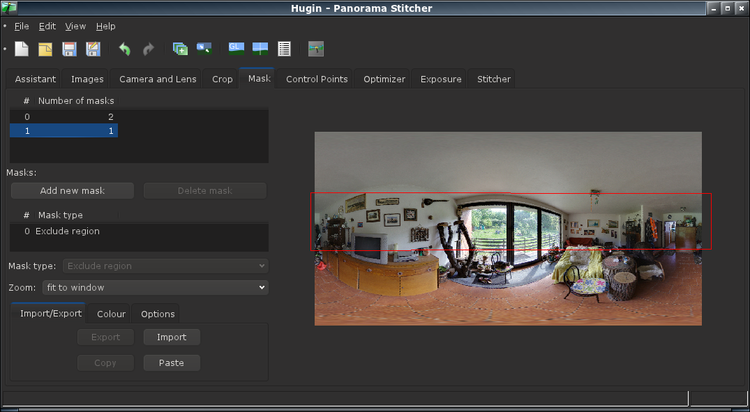
Similarly, create a mask for image "pano08_c.jpg" to exclude the middle part of the image:
Note that the unmasked overlap between the two images is deliberately left large enough so that enblend can blend them nicely (the images might have a different exposure - especially in case of exposure stacks).
Now stitch the panorama and you are done.
Bash script
Save the bash script to your linux box, make it executable ("chmod +x correct_zenith_blending.sh") and run it with a single parameter being the name of the pto project file ("./correct_zenith_blending.sh pano08.pto").
The corrected panorama image shall be named "tmp_x_d.jpg".
(My scripting skill are pretty weak, feel free to improve the script.)
<source lang="bash">
- !/bin/bash
pto_in="${1}" test -f "${pto_in}" || exit 1 test -f `which transform-pano` || exit 1 test -f `which hugin_stitch_project` || exit 1 for i in tmp_x_* ; do test -f ${i} && rm ${i} ; done
- Generate the default levelled panorama image
hugin_stitch_project -o tmp_x_x "${pto_in}" mv tmp_x_x*.jpg tmp_x_a.jpg
- yaw 90, pitch 90 to get zenith & nadir to middle of equirecangular image
transform-pano 0 90 90 "${pto_in}" tmp_x_b.pto hugin_stitch_project -o tmp_x_x tmp_x_b.pto mv tmp_x_x*.jpg tmp_x_b.jpg
- Get pano's output width and height
wXXXX=$(cat tmp_x_b.pto | egrep "^p " | cut -s -d "w" -f2 | cut -d " " -f1 ) hXXXX=$(cat tmp_x_b.pto | egrep "^p " | cut -s -d "h" -f2 | cut -d " " -f1 )
- Define parameters for masks
XXWidth=${wXXXX} XXTopBar=$((${hXXXX} / 100 * 10)) XXBotBar=$((${hXXXX} / 100 * 90)) XXHeight=${hXXXX} XXTopY=$((${hXXXX} / 100 * 35)) XXBotY=$((${hXXXX} / 100 * 65))
- Create pto for transforming tmp_x_b.jpg to back to a levelled pano
cat > tmp_x_c.pto <<'EOF'
- hugin project file
- hugin_ptoversion 2
p f2 wXXXX hXXXX v360 E0 R0 n"TIFF_m c:LZW r:CROP" m g1 i0 f0 m2 p0.00784314
- image lines
- -hugin cropFactor=1
i wXXXX hXXXX f4 v360 Ra0 Rb0 Rc0 Rd0 Re0 Eev0 Er1 Eb1 r90 p0 y-90 TrX0 TrY0 TrZ0 j0 a0 b0 c0 d0 e0 g0 t0 Va1 Vb0 Vc0 Vd0 Vx0 Vy0 Vm5 u10 n"tmp_x_b.jpg"
- specify variables that should be optimized
v
- control points
- hugin_optimizeReferenceImage 0
- hugin_blender enblend
- hugin_remapper nona
- hugin_enblendOptions
- hugin_enfuseOptions
- hugin_hdrmergeOptions -m avg -c
- hugin_outputLDRBlended true
- hugin_outputLDRLayers false
- hugin_outputLDRExposureRemapped false
- hugin_outputLDRExposureLayers false
- hugin_outputLDRExposureBlended false
- hugin_outputLDRExposureLayersFused false
- hugin_outputHDRBlended false
- hugin_outputHDRLayers false
- hugin_outputHDRStacks false
- hugin_outputLayersCompression LZW
- hugin_outputImageType jpg
- hugin_outputImageTypeCompression LZW
- hugin_outputJPEGQuality 99
- hugin_outputImageTypeHDR exr
- hugin_outputImageTypeHDRCompression LZW
EOF
- Substitute variables with actual parameters
cat tmp_x_c.pto | sed "s/wXXXX/w${wXXXX}/g" | sed "s/hXXXX/h${hXXXX}/g" > tmp_x_x.pto mv tmp_x_x.pto tmp_x_c.pto hugin_stitch_project -o tmp_x_c tmp_x_c.pto
- Create pto for blending the two images (_a and _c) together
cat > tmp_x_d.pto <<'EOF'
- hugin project file
- hugin_ptoversion 2
p f2 wXXXX hXXXX v360 E0 R0 n"TIFF_m c:LZW r:CROP" m g1 i0 f0 m2 p0.00784314
- image lines
- -hugin autoCenterCrop=1 cropFactor=1
i wXXXX hXXXX f4 v360 Ra0 Rb0 Rc0 Rd0 Re0 Eev0 Er1 Eb1 r0 p0 y0 TrX0 TrY0 TrZ0 j0 a0 b0 c0 d0 e0 g0 t0 Va1 Vb0 Vc0 Vd0 Vx0 Vy0 Vm5 u10 n"tmp_x_a.jpg"
- -hugin cropFactor=1
i wXXXX hXXXX f4 v=0 Ra=0 Rb=0 Rc=0 Rd=0 Re=0 Eev0 Er1 Eb1 r0 p0 y0 TrX0 TrY0 TrZ0 j0 a=0 b=0 c=0 d=0 e=0 g=0 t=0 Va=0 Vb=0 Vc=0 Vd=0 Vx=0 Vy=0 Vm5 u10 n"tmp_x_c.jpg"
- specify variables that should be optimized
v r1 v p1 v y1 v
- control points
- masks
k i0 t0 p"0 0 XXWidth 0 XXWidth XXTopBar 0 XXTopBar 0 XXTopBar" k i0 t0 p"0 XXBotBar XXWidth XXBotBar XXWidth XXHeight 0 XXHeight" k i1 t0 p"0 XXTopY XXWidth XXTopY XXWidth XXBotY 0 XXBotY 0 XXBotY"
- hugin_optimizeReferenceImage 0
- hugin_blender enblend
- hugin_remapper nona
- hugin_enblendOptions
- hugin_enfuseOptions
- hugin_hdrmergeOptions -m avg -c
- hugin_outputLDRBlended true
- hugin_outputLDRLayers false
- hugin_outputLDRExposureRemapped false
- hugin_outputLDRExposureLayers false
- hugin_outputLDRExposureBlended false
- hugin_outputLDRExposureLayersFused false
- hugin_outputHDRBlended false
- hugin_outputHDRLayers false
- hugin_outputHDRStacks false
- hugin_outputLayersCompression LZW
- hugin_outputImageType jpg
- hugin_outputImageTypeCompression LZW
- hugin_outputJPEGQuality 99
- hugin_outputImageTypeHDR exr
- hugin_outputImageTypeHDRCompression LZW
EOF
- Substitute variables with actual parameters
cat tmp_x_d.pto | sed "s/wXXXX/w${wXXXX}/g" | sed "s/hXXXX/h${hXXXX}/g" \
               | sed "s/XXWidth/${XXWidth}/g"   | sed "s/XXBotBar/${XXBotBar}/g" \
               | sed "s/XXTopBar/${XXTopBar}/g" | sed "s/XXHeight/${XXHeight}/g" \
               | sed "s/XXTopY/${XXTopY}/g"     | sed "s/XXBotY/${XXBotY}/g"     > tmp_x_x.pto
mv tmp_x_x.pto tmp_x_d.pto hugin_stitch_project -o tmp_x_d tmp_x_d.pto
echo "" echo "" echo "Use tmp_x_d.jpg for your spherical panorama viewer." echo "Running \"rm tmp_x_*\" will delete all files created by $0 script." </source>
