Difference between revisions of "Creating Gores"
(categorise) |
Erik Krause (talk | contribs) m (PTGui won't work, wrong crop type.) |
||
| Line 1: | Line 1: | ||
This is something I'm often asked, how to extract Gores from a spherical panorama so they can be printed and stuck together to form a globe? | This is something I'm often asked, how to extract Gores from a spherical panorama so they can be printed and stuck together to form a globe? | ||
| − | You can do this with | + | You can do this with [[Hugin]] using the following technique, it is slower than something like [[Flexify]], but it doesn't have any size limitations and allows you to add seam overlap allowances if necessary. |
| − | The technique relies on the fact that gores are essentially 180 degree vertical slices of ''transverse cylindrical'' mappings of the scene. For this tutorial I used [[Hugin]], but other similar tools should work just as well. | + | The technique relies on the fact that gores are essentially 180 degree vertical slices of ''transverse cylindrical'' mappings of the scene. For this tutorial I used [[Hugin]], but other similar tools should work just as well provided they use the [[Panotools_internals#Cropping|"Selection" crop type]] - [[PTGui]] won't work. |
Start with an [[Equirectangular_Projection|equirectangular]] image: | Start with an [[Equirectangular_Projection|equirectangular]] image: | ||
Latest revision as of 22:48, 2 June 2020
This is something I'm often asked, how to extract Gores from a spherical panorama so they can be printed and stuck together to form a globe?
You can do this with Hugin using the following technique, it is slower than something like Flexify, but it doesn't have any size limitations and allows you to add seam overlap allowances if necessary.
The technique relies on the fact that gores are essentially 180 degree vertical slices of transverse cylindrical mappings of the scene. For this tutorial I used Hugin, but other similar tools should work just as well provided they use the "Selection" crop type - PTGui won't work.
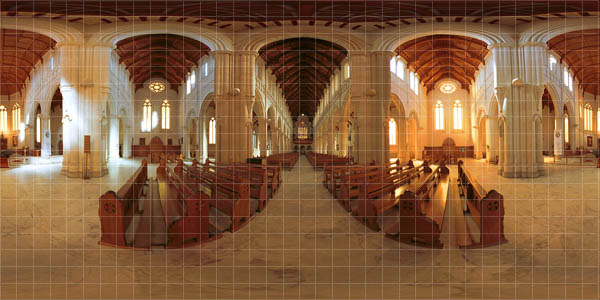
Start with an equirectangular image:
Load it as a 360 degree wide equirectangular projection photo, set the rotation of the photo to 90 degrees.
For the project output, set the projection to Cylindrical Projection, the width to 180 degrees, and for the 30 degree wide gores in this example, set the height to 30 degrees. Set the pixel width of the output to the same pixel height as the input photo.
The result is a single gore, except it also includes unwanted information around the edges.
To lose this excess information and gain a true gore shape, go to the Crop tab and set the crop for the input photo.
For this example the gores are 30 degrees wide, i.e. there would be twelve to make a complete sphere, so you want to include just the middle 30 degrees of the input photo.
In this case the input panorama is very small (600 pixels wide), so the gore needs to represent the middle 50 pixels, set the left crop to 275 pixels and the right crop to 325 pixels. This is the result:
So that is your first gore, for the next gore you need to change the pitch (yes pitch) of the photo to 30 degrees. You also need to move the crop window to match: in the Crop tab, unset Always centre crop on d,e and set the left crop to 325 and the right crop to 375.
Keep going, updating the pitch and the crop window each time, stitching each in turn, and they will look something like this:
This is fine for printing on paper and sticking together with tape, but for larger sewn or welded structures you need to have an overlap allowance.
Go back to the initial uncropped version of the gore and change the output height of the panorama to something a bit larger than 30 degrees, such as 32 degrees.
Stitch a full set of these oversize uncropped gores, still incrementing the pitch by 30 degrees each time. Then in an image editor use one of the earlier cropped gores as a template to mark the shape for cutting, use the wand select tool to pick and grow this template to give you whatever size allowance you need for your needs.
That's it, please fix all the bits in this tutorial that could be better.


