Difference between revisions of "Special issues with fisheye lenses"
m (linkified) |
m (linkified) |
||
| Line 47: | Line 47: | ||
== Entrance Pupil (Nodal Point) == | == Entrance Pupil (Nodal Point) == | ||
| − | Fisheye lenses and adapters do not have a fixed entrance pupil ( | + | Fisheye lenses and adapters do not have a fixed entrance pupil ([[Nodal Point]]), as most rectilinear lenses do. Instead, the entrance pupil of a fisheye lens depends on the angle from the lens axis, typically moving forward as the angle increases from 0 degrees to 90 degrees. |
In theory, this means that it is impossible to get a perfectly stitched panorama from a fisheye lens. | In theory, this means that it is impossible to get a perfectly stitched panorama from a fisheye lens. | ||
Revision as of 23:07, 6 November 2005
Introduction
Fisheye lenses and adapters are very popular because they allow full-spherical panoramas to be constructed from just a few images -- as few as 2 or 3, more typically 4-7. Their vast field of view is achieved by a special mapping of the reality to the flat image. See Fisheye Projection for details.
Types of Fisheye Images
Consider the following five images:
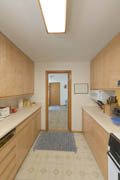
- The first image, for reference, is from a conventional rectilinear wideangle lens. [*]
- The second image is "full-frame" fisheye, using a lens with supposed 16mm focal length to fill a 24x36mm frame on film. The usable fov of this image is about 98 degrees horizontal by 147 degrees vertical. However, the widely used Zenitar 16mm fisheye has only about 82� horizontal and 125� vertical FoV.
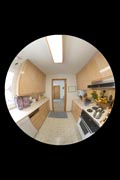
- The third image is "full circular" fisheye, using an 8mm focal length lens to place its entire 22.08mm image circle within a 24x36mm frame on film. The usable fov of this image is 180 degrees horizontal and vertical.
- The fourth image is "portrait cropped circular" fisheye, using the same 8mm focal length lens, but now with a Canon D300 digital SLR whose sensor size is only 22.2x14.8mm. The usable fov of this image is only about 120 degrees horizontal by 180 degrees vertical.
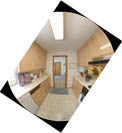
- The final image is a "diagonal cropped circular" fisheye, using the same 8mm lens and Canon D300 digital SLR, but now tipped so that the diagonal of the sensor is vertical. The usable fov of this image is about 145 degrees horizontal by 180 degrees vertical.
[*] Actually these images are all computationally extracted from a spherical panorama, using Panorama Tools and Photoshop. They agree well with real images from a Sigma 8mm F4 EX on Canon D300, but comparison with other lenses will be approximate.
Number of Images Needed for Full Spherical
- For full-frame fisheye, the number of frames depends on the focal length. The illustrated case should work with 4 around plus zenith and nadir (6 total). For the Zenitar 16mm it is at least 5 (better 6) around plus zenith and nadir.
- In theory, 2 full circular fisheyes are enough, but quality around the seams will probably suffer.
- 3 full circular fisheyes are enough to give good overlap at the equator.
- 3 portrait cropped circular fisheyes are not enough -- there will be small holes at the equator.
- 3 diagonal cropped circular fisheyes are enough to get good overlap.
- 4 portrait cropped circular fisheyes are also enough. 5 should be better but is not talked about much. (Maybe odd numbers make people uncomfortable.)
- 6 portrait cropped circular fisheyes seems to be popular.
Zenith and nadir (the poles) are liable to be soft if the camera is perfectly level, because those areas come from the very edge of every frame. They can be improved by shooting separate zenith and/or nadir images. If you shoot the equatorial images tipped slightly up or down, then you can get overlap and improved quality for free at one pole. The other pole can be covered by a separate zenith or nadir shot, or with a reflective ball, logo, or Photoshop clone tool if it's not important.
When shooting handheld or on monopod, more overlap is safer than less. Many people get good results with 6 around plus zenith and/or nadir if those are important.
Entrance Pupil (Nodal Point)
Fisheye lenses and adapters do not have a fixed entrance pupil (Nodal Point), as most rectilinear lenses do. Instead, the entrance pupil of a fisheye lens depends on the angle from the lens axis, typically moving forward as the angle increases from 0 degrees to 90 degrees.
In theory, this means that it is impossible to get a perfectly stitched panorama from a fisheye lens.
In practice, stitching can be almost perfect if you calibrate your camera mount using the same angle from lens axis that you usually use for stitching.
Control Points
The autopano program often does not find control points that are good for fisheye stitching. It has a tendency to clump many control points in a small area, leaving large areas with no control points at all.
Manual control point placement is more reliable and often worth the trouble.
You do not need a lot of control points to get good stitching with fisheye lenses. If you have properly calibrated your a/b/c lens distortion parameters, then placing only 3-4 control points on each seam often yields good results.
Chromatic Aberration
Some fisheye lenses show significant color fringing caused by lateral chromatic aberration of a type that is well corrected by the Photoshop RAW converter. The Sigma 8mm f4 EX is one such lens, as described for example on Michel Thoby's page
Other fisheyes suffer from non-linear lateral (also called transverse) chromatic aberration which is not easily corrected with the RAW converter since correction in one area causes fringing in another area. This can be solved with the Panorama Tools Plugins Correct-> Radial Shift filter which allows for very sophisticated corrections. There is an excellent way to determine correction parameters using PTShift from Eric Gerds page
Other Links
See John Houghton's tutorial for tips.


