Self-made object turntable
There are two methods (that I know of) for capturing images for Virtual Objects � use a still camera, or a video camera. Either can be automated (camera and turntable are controlled by software) or manual (you move the turntable and take the photo.) The manual method requires that you use a still camera, which I prefer over video anyway. This tutorial will cover how to create your own turntable.
The turntable is basically a surface that can be rotated. The best method I have found (supports up to 50 lbs!) is to use an off-the-shelf lazy Susan from Ikea, the model they call the �Rulla.� I use this model because the turntable is large (20 inches) and the mechanism that rotates the turntable is also large (almost 13 inches.) This 13� rotation base means that the turntable will not tip! But you need to pick your turntable carefully - these are mass produced, and often in a hurry.
I went through a dozen at my local Ikea until I found one where the base was perfectly centered. If the base is not centered, your object will appear to shift left, right, back and forth, because the turntable will not rotate correctly. The Rulla also has the advantage that it takes a little more effort to turn. You can�t just push it and have it turn a full rotation. It�s like having a built-in brake. This means that the unit will not rotate randomly or move when you don't want it to.
Step 1: get to an Ikea store (of find someone to go for you) and get a Rulla. �No, a Rulla, not a ruller!�
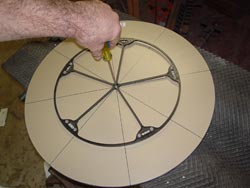
If you can�t pick out one personally, then you�ll have to center the base yourself. This could be a problem because the screw will be close to center, and the hole will be in the way. You�ll have to remove the base, fill the hole, then find the center point and remount the base.
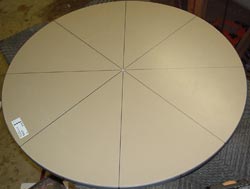
Step 2: turn upside-down (the Rulla, not you) - remove the base. Take a medium Sharpie or other permanent market, and divide the base into quadrants. Then subdivide. I divided mine into 8 pie-shaped wedges. After this is done, extend the lines so they go up the edge of the turntable.
Step 3: put the base back on (or drill a center hole first � see step 5)
Step 4: add more lines to the edge. I used a different color for this step. This allows you to have 16 wedges, or 16 images. To be honest, the lines don�t have to be totally accurate, but the closer you are, the better your rotation will be.
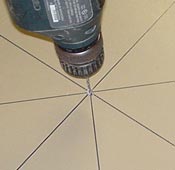
Step 5: you need to mark the center of the turntable top. There are a couple of methods of doing this. One is to drill a small hole from the underside before you reattach the base. This would be drilled through the center of the mounting hole for the base. Do NOT drill this using your lap or on the kitchen table as a work surface. Either method may cause damage that will upset your spouse / significant other / parents. This method is fast, and should be done before step 3. Another method is to figure out the center point, and draw a dot or small circle. I used the drill method. In the garage.
Step 6: appreciate your work, for it is good.
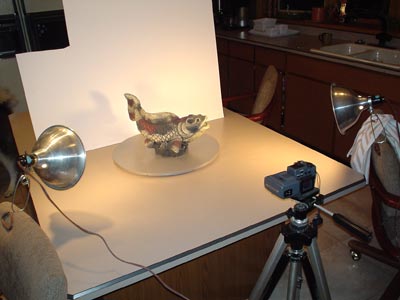
Can you get more home-made? But the results are great! Here is the result of the koi statue photos (Koi Statue) You now have a turntable, and are ready for your first photo shoot. But Hold on � you need some lighting! As you can see from this photo, I used clamp lights. I only had two, but would have liked three - the third would have eliminated the shadows, making image cleanup easier. The backdrop is simply a piece of artboard. I'm working on a better backdrop, basically a frame of PVC ans white cloth that can be backlit, and would wrap around three sides.
NOW you can shoot and assebmle your images! See Create object movies
--Add360.com 21:33, 6 Nov 2005 (EST)


