Difference between revisions of "How to use enblend for patching zenith and nadir images"
(The Gimp -> GIMP (official naming)) |
|||
| (10 intermediate revisions by 3 users not shown) | |||
| Line 1: | Line 1: | ||
| − | * Create your panorama | + | * Create your panorama as two partial images: |
| + | One image will include only the horizontal part of the panorama without [[zenith]] and [[nadir]] (if using [[PTGui]], select only the horizontal images in the Include images area of the Create Panorama tab). | ||
| + | The other image will include only the zenith and nadir (if using PTGui, select only the zenith and nadir images in the Include images area of the Create Panorama tab). | ||
| + | Use [[TIFF]] for output type (if using PTGui, select TIFF in the Create Panorama tab in the File format: section. | ||
| − | * Using TIFF | + | * Using [[TIFF]], Panotools will automatically add to output images, an [[alpha channel]] which shows valid areas in the projected [[equirectangular]] image. You can adapt this channel in the next steps to reflect your real needs. |
| − | * Load them into a image editor which can handle alpha channels (e.g. Photoshop or | + | * Load them into a image editor which can handle alpha channels (e.g. [[Photoshop]] or [[GIMP]]). Now enable the alpha channel and mark the channel for editing. Using [[Photoshop]] you will find this function in the layer windows ("Channels"): |
[[Image:Blendc1.jpg]] | [[Image:Blendc1.jpg]] | ||
| Line 17: | Line 20: | ||
[[Image:Blend2.jpg]] | [[Image:Blend2.jpg]] | ||
| − | * Switch to the Alpha Channel. You can now edit the Alpha-Mask to your own needs. Use a simple brush with no feather to "paint" unwanted areas | + | * Switch to the Alpha Channel. You can now edit the Alpha-Mask to your own needs. Use a simple brush with no feather to "paint" unwanted areas. Edit the alpha channel by painting black to exclude areas, and white to include areas. |
| − | + | (Photoshop, press d for default colors. Press x to switch between black and white). Black paint will show up as red, if you are using Photoshop's default colors | |
Modified Image 1: | Modified Image 1: | ||
| Line 29: | Line 32: | ||
* Use "save as" to save these images back on harddisk. Use "uncompressed TIFF" as file type. | * Use "save as" to save these images back on harddisk. Use "uncompressed TIFF" as file type. | ||
| − | ''Note: When Photoshop shows the alpha-channel (you have activated the "eye" on the layer) it will be shown in semi-transparent red color. This is no real color but a visualisation of the alpha-channel. When saving the image it doesn't matter if the channel is activated or not - the channel will be included in the TIFF-image'' | + | ''Note: When [[Photoshop]] shows the alpha-channel (you have activated the "eye" on the layer) it will be shown in semi-transparent red color. This is no real color but a visualisation of the alpha-channel. When saving the image it doesn't matter if the channel is activated or not - the channel will be included in the TIFF-image'' |
* Open a command line and change to the directory where these files are saved. | * Open a command line and change to the directory where these files are saved. | ||
| − | + | Use [[enblend]] to merge the files with a command like | |
enblend -vo output.tif image1.tif image2.tif | enblend -vo output.tif image1.tif image2.tif | ||
| Line 39: | Line 42: | ||
[[Image:Myra.jpg]] | [[Image:Myra.jpg]] | ||
| + | |||
| + | [[Category:Tutorial:Nice to know]] | ||
Latest revision as of 14:11, 21 November 2022
- Create your panorama as two partial images:
One image will include only the horizontal part of the panorama without zenith and nadir (if using PTGui, select only the horizontal images in the Include images area of the Create Panorama tab). The other image will include only the zenith and nadir (if using PTGui, select only the zenith and nadir images in the Include images area of the Create Panorama tab). Use TIFF for output type (if using PTGui, select TIFF in the Create Panorama tab in the File format: section.
- Using TIFF, Panotools will automatically add to output images, an alpha channel which shows valid areas in the projected equirectangular image. You can adapt this channel in the next steps to reflect your real needs.
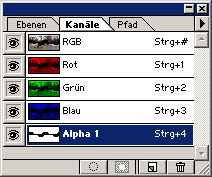
- Load them into a image editor which can handle alpha channels (e.g. Photoshop or GIMP). Now enable the alpha channel and mark the channel for editing. Using Photoshop you will find this function in the layer windows ("Channels"):
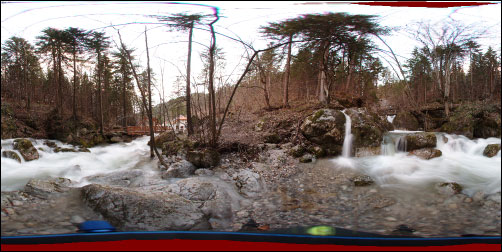
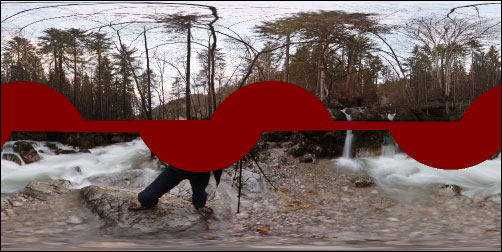
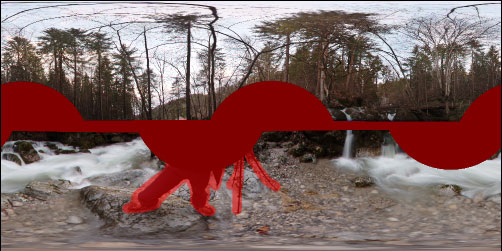
In your images you will now see the alpha channel as a red overlay over your image:
Example Image 1:
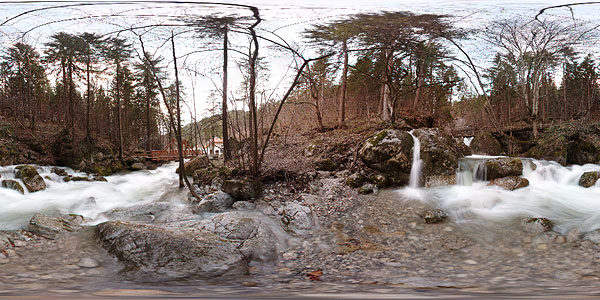
Example Image 2:
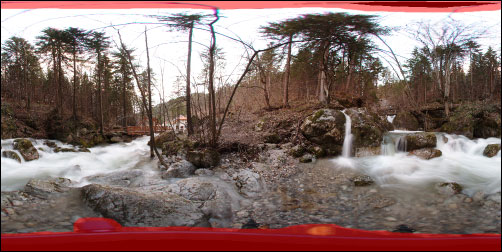
- Switch to the Alpha Channel. You can now edit the Alpha-Mask to your own needs. Use a simple brush with no feather to "paint" unwanted areas. Edit the alpha channel by painting black to exclude areas, and white to include areas.
(Photoshop, press d for default colors. Press x to switch between black and white). Black paint will show up as red, if you are using Photoshop's default colors Modified Image 1:
Modified Image 2:
- Use "save as" to save these images back on harddisk. Use "uncompressed TIFF" as file type.
Note: When Photoshop shows the alpha-channel (you have activated the "eye" on the layer) it will be shown in semi-transparent red color. This is no real color but a visualisation of the alpha-channel. When saving the image it doesn't matter if the channel is activated or not - the channel will be included in the TIFF-image
- Open a command line and change to the directory where these files are saved.
Use enblend to merge the files with a command like
enblend -vo output.tif image1.tif image2.tif
you will blend these images together. Seams will be automatically positioned for best fit:
