Difference between revisions of "Historical:Edit zenith and nadir in one go with Adjust filter"
Erik Krause (talk | contribs) m (categorized) |
Erik Krause (talk | contribs) m (categorized) |
(No difference)
| |
Revision as of 20:07, 21 March 2007
Workflow
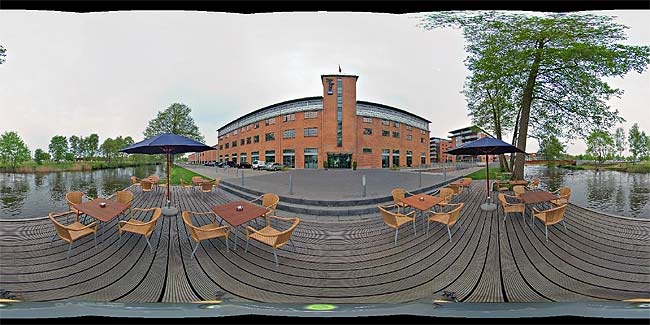
This equirectangular pano-image below is made from 4 portrait shots done with Peleng
8 mm on D70 (see left side). As the fisheye circle from that lens is bigger than the
height of the CCD the circle get cut off at nadir and zenith.
To retouch the nadir/zenith holes and/or inserting nadir/zenith shots you can produce a
more comfortable view using the Ptools Adjust plugin from Photoshop. This article
tells you how to use this plugin:
Step 1
Make sure you have saved the image before you
continue if you have made some changes to the
original.
Step 2
Flatten the image to make sure the plugin use the
full image size.
Step 3
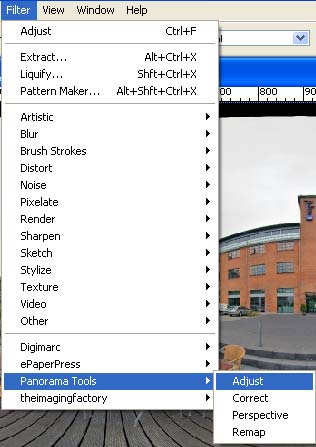
Select Filter / Panorama Tools / Adjust
Step 4
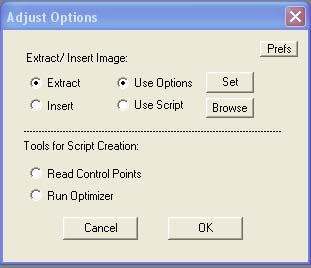
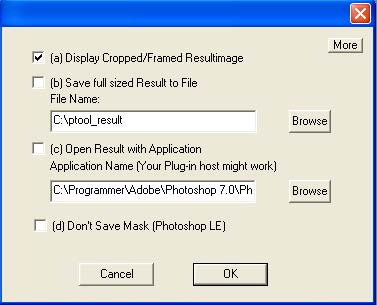
Select Extract and Use Options and click on Prefs where you set (a) Display Cropped / Framed Resultimage
and perhaps click on More to changes the Interpolation Options. When done click OK to return to the Adjust Option
window.
Step 5
Now click on Set to go to the Options for Insert/Extract - window and set the options as shown here below - having
the Width and Height set to your image size. (The plugin will remember these setting and the same goes for the the
prefs-setting - so as long as you use the same size you don't have to do these steps again for the next pano!)
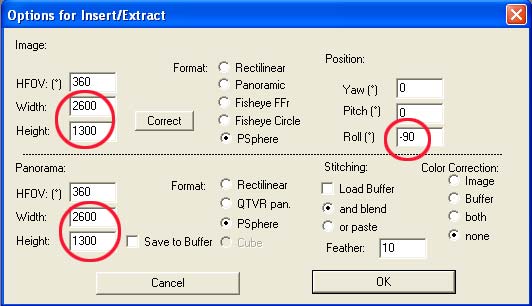
When done click OK and click OK again in the Adjust Option - window.
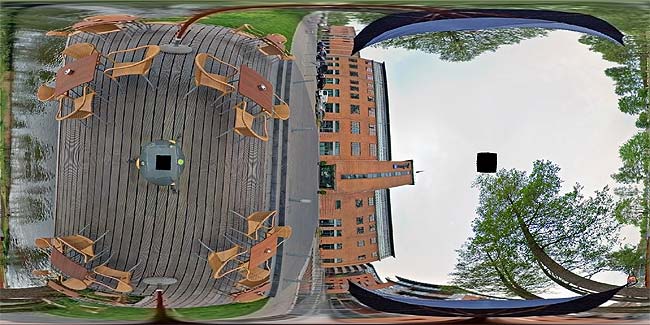
You should now have this view, where you should be able to edit/retouch both nadir and zenith in a
more convienient way. With a pale sky like this the hole could easily be filled using the clone tool.
If you have individual equirectangular zenith and/or nadir shot you should run them through the same
steps and clip/paste the needed part into a layer in the main picture - and use the transform tool to
tweek it into place.
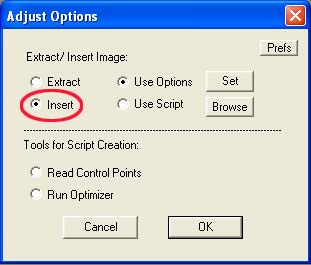
Step 6
When finished with your modification go back to normal
equirectangular view with Filter/Panorama Tools/Adjust .
This time you just mark Insert instead of Extract .
OOPS!! If you have created more layer remember to flatten
the image first! And remember to remove any selections.
Otherwise the adjust will only work on one layer with selction.
TIP
As there might be some minor degration of the image quality after every remap you can select and copy only the
altered parts and insert them into the original. And as the nadir/zenith parts allready are rather distorted
in equirectangular view, this will also allow you to use a faster Interpolation method like spline 16, without
having to worry about the more essential parts of the pano.
Images and text by Flemming V. Larsen
Content transfered to this wiki by Peter Nyfeler (Pitdavos)

