Difference between revisions of "Control points"
m (basic page on control points, needs diagram) |
m (Reverted edits by SimonAtkins (Talk) to last version by Erik Krause) |
||
| (13 intermediate revisions by 7 users not shown) | |||
| Line 1: | Line 1: | ||
| + | {{Glossary|are used to identify matching features in adjacent images.}} | ||
Most techniques for aligning photographs involve '''Control points''' at some stage. | Most techniques for aligning photographs involve '''Control points''' at some stage. | ||
| Line 10: | Line 11: | ||
As well as adjusting this [[roll]], [[pitch]] & [[yaw]] orientation, often | As well as adjusting this [[roll]], [[pitch]] & [[yaw]] orientation, often | ||
| − | [[ | + | [[Field of View]] and other aspects of the [[lens correction model]] are ''optimised'' at the same |
time. | time. | ||
| Line 21: | Line 22: | ||
These have various uses, but mainly they are good for [[Leveling a Finished Panorama]] and | These have various uses, but mainly they are good for [[Leveling a Finished Panorama]] and | ||
[[perspective correction]]. | [[perspective correction]]. | ||
| + | |||
| + | == Historical note == | ||
| + | |||
| + | Before [[PTPicker]], the [[GUI front-ends]] and [[autopano]]/[[autopano-sift]], control points | ||
| + | were set by cutting and pasting the flags below into source photos. You were allowed up to | ||
| + | twenty pairs of points and twenty images - Panorama Tools would read the bar codes embedded in | ||
| + | the flags and generate a script for [[PTOptimizer]]. | ||
| + | |||
| + | This functionality is still available in the ''adjust'' menu of the [[Panorama Gimp plug-in]], | ||
| + | however the technique is extremely laborious and '''definitely not recommended'''. | ||
| + | |||
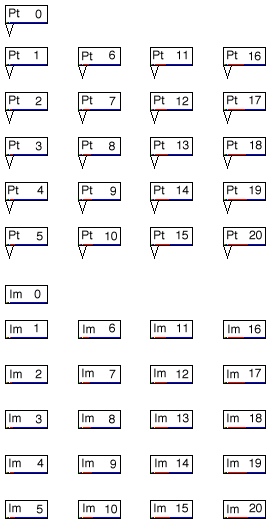
| + | [[Image:Flags.png|Barcode flags used by the original panorama tools control point picking technique]] | ||
[[Category:Glossary]] | [[Category:Glossary]] | ||
Revision as of 06:25, 16 May 2011
Most techniques for aligning photographs involve Control points at some stage.
The principle is that by identifying the same physical features (a door, a tree, whatever) in more than one photo, it is possible to establish facts about the relative camera orientations mathematically. The pano12 library contains a program called PTOptimizer that does this job.
Each of these real-world features is defined as a pair of control points. Usually two pairs of control points are sufficient to simply align one photograph against another, and more photographs require more pairs - This alignment process is called control point optimisation.
As well as adjusting this roll, pitch & yaw orientation, often Field of View and other aspects of the lens correction model are optimised at the same time.
Control points can be picked manually by clicking with a mouse, and there are a number of GUI front-ends to help you do this. There are other tools such as autopano-sift and autopano that can generate control points automatically with some limitations.
In addition to these simple control points, PTOptimizer allows users to define horizontal control points, vertical control points and straight line control points. These have various uses, but mainly they are good for Leveling a Finished Panorama and perspective correction.
Historical note
Before PTPicker, the GUI front-ends and autopano/autopano-sift, control points were set by cutting and pasting the flags below into source photos. You were allowed up to twenty pairs of points and twenty images - Panorama Tools would read the bar codes embedded in the flags and generate a script for PTOptimizer.
This functionality is still available in the adjust menu of the Panorama Gimp plug-in, however the technique is extremely laborious and definitely not recommended.
