Difference between revisions of "Adding a nadir logo with text"
m (→Testing file size and position: added image as thumbnail) |
m (Updated link to Windows Photoshop plug-ins) |
||
| (40 intermediate revisions by 5 users not shown) | |||
| Line 1: | Line 1: | ||
| − | |||
| − | |||
| − | |||
| − | |||
| − | |||
| − | |||
| − | |||
== For what it is... == | == For what it is... == | ||
| − | The equirectangular projection is the starting point of several products.<br> | + | The [[equirectangular]] projection is the starting point of several products.<br> |
| − | This projection is extermly streched at zenith and nadir. An insertion of<br> | + | This projection is extermly streched at [[zenith]] and [[nadir]]. An insertion of<br> |
a logo text isn't possible in one go or it looks distorted. in this tutorial<br> | a logo text isn't possible in one go or it looks distorted. in this tutorial<br> | ||
I show you a way to create such a remapped text that can be inserted directly<br> | I show you a way to create such a remapped text that can be inserted directly<br> | ||
in an equirectangular panorama. The other advantage is that with this text you<br> | in an equirectangular panorama. The other advantage is that with this text you<br> | ||
| − | don' need to remap the whole panorama. Every transformation results in quality<br> | + | don't need to remap the whole panorama. Every transformation results in quality<br> |
loss.<br> | loss.<br> | ||
<br> | <br> | ||
| Line 20: | Line 13: | ||
* Photoshop or a software that can run Photoshop actions (f. e. Gimp [http://www.gimp.org/windows/ Win], [http://www.gimp.org/macintosh/ Mac OSX], [http://www.gimp.org/unix/ Unix] ) | * Photoshop or a software that can run Photoshop actions (f. e. Gimp [http://www.gimp.org/windows/ Win], [http://www.gimp.org/macintosh/ Mac OSX], [http://www.gimp.org/unix/ Unix] ) | ||
* An equirectangular panorama (PSPhere, f. e. 6000 x 3000 pixels) | * An equirectangular panorama (PSPhere, f. e. 6000 x 3000 pixels) | ||
| − | * | + | * [[Panorama_Tools_Plugins]] for Photoshop Previously available on 'ePaperPress' by Thomas Niemann, are now available from Jim Watters at http://photocreations.ca/panotools/index.html |
* Batch file to produce faces from an equirectangular pano(Pano2Faces.bat) and vice versa (Cube2Pano.bat) from Eric Gerds (download [http://www.pinlady.net/vr/#anchor3 here]) | * Batch file to produce faces from an equirectangular pano(Pano2Faces.bat) and vice versa (Cube2Pano.bat) from Eric Gerds (download [http://www.pinlady.net/vr/#anchor3 here]) | ||
| − | * Photoshop action to create the mirror ball cap with white text plate (download [ | + | * Photoshop action to create the mirror ball cap with white text plate (download [[Media:cap_text.atn]]) |
* Logo text as Photoshop file (download [http://www.nyfeler-mueller.ch/TripodCapText/downloads/LogoText.psd LogoText.psd]) | * Logo text as Photoshop file (download [http://www.nyfeler-mueller.ch/TripodCapText/downloads/LogoText.psd LogoText.psd]) | ||
| Line 55: | Line 48: | ||
Here you can find two different ways to extract the nadir view for inserting a logo:<br> | Here you can find two different ways to extract the nadir view for inserting a logo:<br> | ||
<br> | <br> | ||
| − | [[ | + | [[#Remapping_nadir_with_PanoTools_Plugins|1.) With Panotools Plugins]]<br> |
| − | [[ | + | [[#Remapping_nadir_with_extracting_cube_faces|2.) With extracting cube faces]]<br> |
<br> | <br> | ||
| + | Other ways how to extract rectilinear images from a pano are described in [[Extracting and inserting rectilinear Views]] | ||
<br> | <br> | ||
| Line 103: | Line 97: | ||
---- | ---- | ||
| + | |||
| + | <br> | ||
| + | <br> | ||
| + | <br> | ||
=== ''Remapping nadir with extracting cube faces'' === | === ''Remapping nadir with extracting cube faces'' === | ||
| + | |||
| + | First of all, save panorama with a new name to the folder,<br> | ||
| + | where you also will find the resulting faces from these steps.<br> | ||
| + | In my case I use the name ''Entry_plate.tif'':<br> | ||
| + | <br> | ||
| + | [[Image:CapText_028.jpg]]<br> | ||
| + | <br> | ||
| + | <br> | ||
| + | <br> | ||
| + | Open Windows Explorer and choose folder where you have saved the modified panorama.<br> | ||
| + | Right click on the file, go to ''send to...'' and choose ''Pano2Faces.bat'' to<br> | ||
| + | extract six Cube faces out of the equirectangular panorama.<br> | ||
| + | <br> | ||
| + | [[Image:CapText_029.jpg]]<br> | ||
| + | <br> | ||
| + | <br> | ||
| + | <br> | ||
| + | Now a dos window pops up in which you have to define the size of the cubfaces:<br> | ||
| + | <br> | ||
| + | [[Image:CapText_030.jpg]]<br> | ||
| + | <br> | ||
| + | <br> | ||
| + | <br> | ||
| + | According to the size of the original panorama we have a equirectangular<br> | ||
| + | projection with 6000 pixel width and 3000 pixel height.<br> | ||
| + | *6000 / 3.14 = 1910 (approx.)<br> | ||
| + | <br> | ||
| + | [[Image:CapText_031.jpg]]<br> | ||
| + | <br> | ||
| + | <br> | ||
| + | <br> | ||
| + | Hit ''enter'' key and the batch file starts processing.....<br> | ||
| + | <br> | ||
| + | [[Image:CapText_032.jpg]]<br> | ||
| + | <br> | ||
| + | <br> | ||
| + | <br> | ||
| + | ..... and now you can see the six cube faces generated by the batch process.<br> | ||
| + | We need only the nadir face with the ending ''_66''. The white text plate is<br> | ||
| + | cleraly visible in the middle of this face.<br> | ||
| + | <br> | ||
| + | [[Image:CapText_033.jpg]]<br> | ||
| + | <br> | ||
| + | <br> | ||
| + | <br> | ||
| + | Zoomed in.....<br> | ||
| + | <br> | ||
| + | [[Image:CapText_034.jpg]]<br> | ||
| + | <br> | ||
| + | <br> | ||
| + | <br> | ||
== Inserting text == | == Inserting text == | ||
| − | Open a prepared Photoshop text file to fill in like this (for download of an example click [[ | + | |
| + | |||
| + | === Plugin method === | ||
| + | |||
| + | Open a prepared Photoshop text file to fill in like this (for download of an example click [[#What_do_we_need...|here]]):<br> | ||
<br> | <br> | ||
[[Image:CapText_010.jpg]]<br> | [[Image:CapText_010.jpg]]<br> | ||
| Line 131: | Line 184: | ||
<br> | <br> | ||
[[Image:CapText_012.jpg]] | [[Image:CapText_012.jpg]] | ||
| + | <br> | ||
| + | <br> | ||
| + | <br> | ||
| + | ---- | ||
| + | <br> | ||
| + | <br> | ||
| + | <br> | ||
| + | === Cube face method === | ||
| + | Inserting a prepared logo text by drag and drop. When you holding the shift key<br> | ||
| + | the text will be centered<br> | ||
| + | <br> | ||
| + | [[Image:CapText_035.jpg]]<br> | ||
| + | <br> | ||
| + | <br> | ||
| + | <br> | ||
| + | As you can see with this wrokflow with cube faces logo text can be upright.<br> | ||
| + | So if you use the shared logo text sample you have to turn it 90 degree clock wise.<br> | ||
| + | To do so simply press Ctrl+T to transform this layer and turn it by dragging outside<br> | ||
| + | the selection or fill in 90 degree in the menue bar.<br> | ||
| + | <br> | ||
| + | [[Image:CapText_036.jpg]]<br> | ||
| + | <br> | ||
| + | <br> | ||
| + | <br> | ||
| + | Logo text is positioned so we don't need background layer anymore.<br> | ||
| + | We delete it by darg and drop on the recycle bin as shown below:<br> | ||
| + | <br> | ||
| + | [[Image:CapText_037.jpg]]<br> | ||
| + | <br> | ||
| + | <br> | ||
| + | <br> | ||
| + | Reduce the existing layer to background.....<br> | ||
| + | <br> | ||
| + | [[Image:CapText_038.jpg]]<br> | ||
| + | <br> | ||
| + | <br> | ||
| + | <br> | ||
| + | ..... so you can see a black text with a withe background in the size<br> | ||
| + | (1910 x 1910 pixels)of the original cube face:<br> | ||
| + | <br> | ||
| + | [[Image:CapText_039.jpg]]<br> | ||
| + | <br> | ||
| + | <br> | ||
| + | <br> | ||
| + | |||
| + | ---- | ||
<br> | <br> | ||
<br> | <br> | ||
| Line 139: | Line 238: | ||
Here you can find also two different ways to remap the logo text back to PSPhere (Eqirectangular projection):<br> | Here you can find also two different ways to remap the logo text back to PSPhere (Eqirectangular projection):<br> | ||
<br> | <br> | ||
| − | [[ | + | [[#Remapping_text_back_to_PSPhere_with_PanoTools_Plugins|1.) With Panotools Plugins]] |
(These steps have an addiotional transformation to the text because the plugin alter the size of the file while transforming)<br> | (These steps have an addiotional transformation to the text because the plugin alter the size of the file while transforming)<br> | ||
| − | [[ | + | [[#Remapping_text_back_to_PSPhere_with_extracting_cube_faces|2.) With extracting cube faces]]<br> |
<br> | <br> | ||
| + | Other ways how to insert rectilinear images into a pano are described in [[Extracting and inserting rectilinear Views]] | ||
<br> | <br> | ||
| Line 241: | Line 341: | ||
=== ''Remapping text back to PSPhere with extracting cube faces'' === | === ''Remapping text back to PSPhere with extracting cube faces'' === | ||
| − | + | <br> | |
| + | Now you call the second batch file from Eric Gerds (Cube2Pano.bat)<br> | ||
| + | by right click on the nadir face..... <br> | ||
| + | <br> | ||
| + | [[Image:CapText_040.jpg]]<br> | ||
| + | <br> | ||
| + | <br> | ||
| + | <br> | ||
| + | A dos window pops up in which you have to define the width of the<br> | ||
| + | equirectangular pano. In our case this was 6000 pixels. Insert this<br> | ||
| + | value and press ''enter''.....<br> | ||
| + | <br> | ||
| + | [[Image:CapText_041.jpg]]<br> | ||
| + | <br> | ||
| + | <br> | ||
| + | <br> | ||
| + | Converting process with the nadir face only.....<br> | ||
| + | <br> | ||
| + | [[Image:CapText_042.jpg]]<br> | ||
| + | <br> | ||
| + | <br> | ||
| + | <br> | ||
| + | Open the resulting file (Entry_plate_(6000).tif in this case) for further editing.<br> | ||
| + | Choose with wizzard stick tool first the black and second the white area with tolerance<br> | ||
| + | you can see the remapped text on the bottom of this file<br> | ||
| + | <br> | ||
| + | [[Image:CapText_043.jpg]]<br> | ||
| + | <br> | ||
| + | <br> | ||
| + | <br> | ||
| + | Settings for wizzard stick tool:<br> | ||
| + | <br> | ||
| + | [[Image:CapText_044.jpg]]<br> | ||
| + | <br> | ||
| + | <br> | ||
| + | <br> | ||
| + | After deleting of black and white areas you see the finished text file:<br> | ||
| + | <br> | ||
| + | [[Image:CapText_045.jpg]]<br> | ||
| + | <br> | ||
| + | <br> | ||
| + | <br> | ||
| + | Save this file as Photoshop document (.psd) and you are done<br> | ||
| + | <br> | ||
| + | [[Image:CapText_046.jpg]]<br> | ||
| + | <br> | ||
| + | <br> | ||
| + | <br> | ||
---- | ---- | ||
| − | + | <br> | |
| + | <br> | ||
| + | <br> | ||
== Testing file size and position == | == Testing file size and position == | ||
Select the produced file with Ctrl+A (In image below: ''LogoTextNiaRemapped6k3k.psd'')<br> | Select the produced file with Ctrl+A (In image below: ''LogoTextNiaRemapped6k3k.psd'')<br> | ||
| − | and drag and drop it over the panorama with the white | + | and drag and drop it over the panorama with the white text plate by holding shift key<br> |
to center the file.<br> | to center the file.<br> | ||
<br> | <br> | ||
[[Image:CapText_024.jpg|thumb|left|300px|CapText_024.jpg]]<br> | [[Image:CapText_024.jpg|thumb|left|300px|CapText_024.jpg]]<br> | ||
| + | <br> | ||
| + | <br> | ||
| + | <br> | ||
| + | <br> | ||
| + | <br> | ||
| + | <br> | ||
| + | <br> | ||
| + | <br> | ||
| + | <br> | ||
| + | <br> | ||
| + | <br> | ||
| + | <br> | ||
| + | <br> | ||
| + | <br> | ||
| + | <br> | ||
| + | <br> | ||
| + | <br> | ||
| + | <br> | ||
| + | <br> | ||
| + | Flaten the resulting image to background.....<br> | ||
| + | <br> | ||
| + | [[Image:CapText_025.jpg]]<br> | ||
| + | <br> | ||
| + | .....and save the panorama with the added text (Ctrl+Shift+S):<br> | ||
| + | <br> | ||
| + | <br> | ||
| + | <br> | ||
| + | Now you can open the saved file in a prefered viewer (f. e. [[PTEditor]])<br> | ||
| + | to see how the nadir looks like. If it looks like this.....<br> | ||
| + | <br> | ||
| + | [[Image:CapText_027.jpg]]<br> | ||
| + | <br> | ||
| + | You are done. Otherwise you probably made a mistake by following this tutorial<br> | ||
| + | or you have to modify the size of the text file for a better fit.<br> | ||
<br> | <br> | ||
<br> | <br> | ||
<br> | <br> | ||
| − | == How does it | + | == How does it work now (The fast way) == |
| − | + | '''Congratulation!!!'''<br> | |
| − | + | <br> | |
| − | + | Now comes the part to test how fast you can add a nice logo<br> | |
| − | + | in the nadir region of your spherical panorama with your own<br> | |
| − | < | + | generated text.<br> |
| − | + | <br> | |
| − | < | + | <br> |
| − | + | <br> | |
| − | + | '''Here we go:'''<br> | |
| + | <br> | ||
| + | <br> | ||
| + | Open Photoshop, choose the action and press the start button:<br> | ||
| + | (For all following steps you will be guided by messages<br> | ||
| + | trough the whole process)<br> | ||
| + | <br> | ||
| + | [[Image:CapText_047.jpg]]<br> | ||
| + | <br> | ||
| + | <br> | ||
| + | <br> | ||
| + | Message No. 1 generated by the action, continue.....<br> | ||
| + | <br> | ||
| + | [[Image:CapText_048.jpg]]<br> | ||
| + | <br> | ||
| + | <br> | ||
| + | <br> | ||
| + | Open a desired panorama with the above parameters:<br> | ||
| + | <br> | ||
| + | [[Image:CapText_049.jpg]]<br> | ||
| + | <br> | ||
| + | The action creates in the following steps mirrorball with textplate.<br> | ||
| + | Please wait untill you were asked for more..... | ||
| + | <br> | ||
| + | <br> | ||
| + | <br> | ||
| + | <br> | ||
| + | Message No. 2 generated by the action, continue.....<br> | ||
| + | <br> | ||
| + | [[Image:CapText_050.jpg]]<br> | ||
| + | <br> | ||
| + | <br> | ||
| + | <br> | ||
| + | Message No. 3 generated by the action, continue.....<br> | ||
| + | <br> | ||
| + | [[Image:CapText_051.jpg]]<br> | ||
| + | <br> | ||
| + | <br> | ||
| + | <br> | ||
| + | Choose the file with the remapped text which you have created in the tutorial above:<br> | ||
| + | <br> | ||
| + | [[Image:CapText_052.jpg]]<br> | ||
| + | <br> | ||
| + | <br> | ||
| + | <br> | ||
| + | Message No. 4 generated by the action, continue.....<br> | ||
| + | <br> | ||
| + | [[Image:CapText_053.jpg]]<br> | ||
| + | <br> | ||
| + | <br> | ||
| + | <br> | ||
| + | Message No. 5 generated by the action, continue.....<br> | ||
| + | <br> | ||
| + | [[Image:CapText_054.jpg]]<br> | ||
| + | <br> | ||
| + | <br> | ||
| + | <br> | ||
| + | Choose a place where you want to save the modified panorama with the added nadir cap with text:<br> | ||
| + | <br> | ||
| + | [[Image:CapText_055.jpg]]<br> | ||
| + | <br> | ||
| + | <br> | ||
| + | <br> | ||
| + | Since you have created a remapped logo text you are able now to run the<br> | ||
| + | Photoshop action ''cap_text.atn'' in one go to produce a panorama with a nice<br> | ||
| + | mirrorball, a white textplate and a logo text of your choice in the nadir region<br> | ||
| + | to hide f. e. the tripod legs.<br> | ||
| + | <br> | ||
| + | If you don't like the mirrorball with the white text area, please feel free to modify<br> | ||
| + | the action to your needs. I hope this tutorial explains all the steps to your<br> | ||
| + | needs, otherwise change it or let me know what should be changed.<br> | ||
| + | <br> | ||
| + | I'm not native English speaking. Please change wrong words and meanings and take a look<br> | ||
| + | for typos.<br> | ||
| + | <br> | ||
| + | Thank you. | ||
| + | <br> | ||
| + | <br> | ||
| + | -[[User:Pitdavos|Peter Nyfeler]] (Pitdavos) April 17, 2005 | ||
| − | + | [[Category:Tutorial:Specialised]] | |
| − | |||
| − | |||
| − | [[ | ||
| − | |||
| − | |||
| − | |||
| − | |||
| − | |||
| − | |||
| − | |||
| − | |||
| − | |||
| − | |||
| − | |||
| − | |||
| − | |||
| − | |||
| − | |||
| − | |||
| − | |||
| − | |||
| − | |||
| − | |||
| − | |||
| − | |||
| − | |||
| − | |||
| − | |||
| − | |||
| − | |||
| − | |||
| − | |||
| − | |||
| − | |||
| − | |||
| − | |||
| − | |||
| − | |||
| − | |||
| − | |||
| − | |||
| − | |||
| − | |||
| − | |||
| − | |||
| − | |||
| − | |||
| − | |||
| − | |||
| − | |||
| − | |||
| − | |||
| − | |||
| − | |||
| − | |||
| − | |||
| − | |||
| − | |||
| − | |||
| − | |||
| − | |||
| − | |||
| − | |||
| − | |||
| − | |||
| − | |||
| − | |||
| − | |||
| − | |||
| − | |||
| − | |||
| − | |||
| − | |||
| − | |||
| − | |||
| − | |||
| − | |||
| − | |||
| − | |||
| − | |||
| − | |||
| − | |||
| − | |||
| − | |||
| − | |||
| − | |||
| − | |||
| − | |||
| − | |||
| − | |||
| − | |||
| − | |||
| − | |||
| − | |||
| − | |||
| − | |||
| − | |||
| − | |||
| − | |||
| − | |||
| − | |||
| − | |||
| − | |||
| − | |||
| − | |||
| − | |||
| − | |||
| − | |||
| − | |||
| − | |||
| − | |||
| − | |||
| − | |||
| − | |||
| − | |||
| − | |||
| − | |||
| − | |||
| − | |||
| − | |||
| − | |||
| − | |||
| − | |||
| − | |||
| − | |||
| − | |||
| − | |||
| − | |||
| − | |||
| − | |||
| − | |||
| − | |||
| − | |||
| − | |||
| − | |||
| − | |||
| − | |||
| − | |||
| − | |||
| − | |||
| − | |||
| − | |||
| − | |||
| − | |||
| − | |||
| − | |||
| − | |||
| − | |||
| − | |||
| − | |||
| − | |||
| − | |||
| − | |||
| − | |||
| − | |||
| − | |||
| − | |||
| − | |||
| − | |||
| − | |||
| − | |||
| − | |||
| − | |||
| − | |||
| − | |||
| − | |||
| − | |||
| − | |||
| − | |||
| − | |||
| − | |||
| − | |||
| − | |||
Latest revision as of 18:40, 29 May 2007
For what it is...
The equirectangular projection is the starting point of several products.
This projection is extermly streched at zenith and nadir. An insertion of
a logo text isn't possible in one go or it looks distorted. in this tutorial
I show you a way to create such a remapped text that can be inserted directly
in an equirectangular panorama. The other advantage is that with this text you
don't need to remap the whole panorama. Every transformation results in quality
loss.
What do we need...
- Photoshop or a software that can run Photoshop actions (f. e. Gimp Win, Mac OSX, Unix )
- An equirectangular panorama (PSPhere, f. e. 6000 x 3000 pixels)
- Panorama_Tools_Plugins for Photoshop Previously available on 'ePaperPress' by Thomas Niemann, are now available from Jim Watters at http://photocreations.ca/panotools/index.html
- Batch file to produce faces from an equirectangular pano(Pano2Faces.bat) and vice versa (Cube2Pano.bat) from Eric Gerds (download here)
- Photoshop action to create the mirror ball cap with white text plate (download Media:cap_text.atn)
- Logo text as Photoshop file (download LogoText.psd)
Creating a pano with nadir cap
For this step you need the Photoshop action cap_text.atn to produce the
white plate for the logo text.
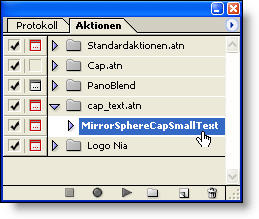
You have to stop the action when you areasked for the remapped text file.
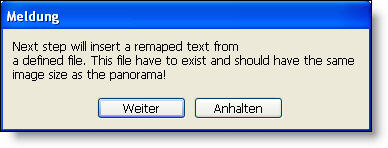
Keep in mind the original size of your panorama (f. e. 6000 x 3000 pixels)
You will need this value later.
After this step the modified panorama looks like this:
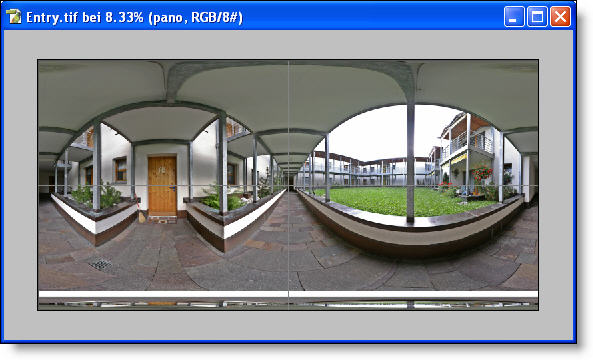
You see a white area where the logo text will be inserted.
Remapping nadir
Here you can find two different ways to extract the nadir view for inserting a logo:
1.) With Panotools Plugins
2.) With extracting cube faces
Other ways how to extract rectilinear images from a pano are described in Extracting and inserting rectilinear Views
Remapping nadir with PanoTools Plugins
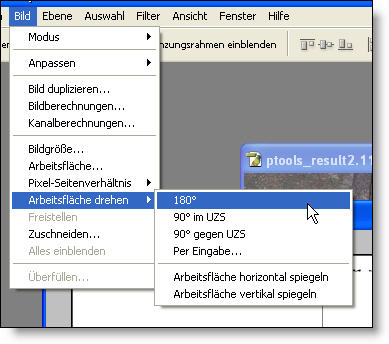
First turn canvas by 180 degree:
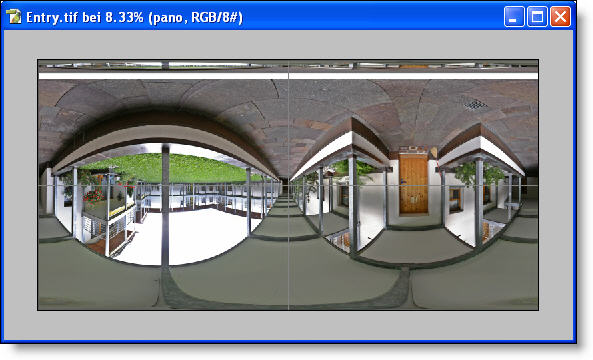
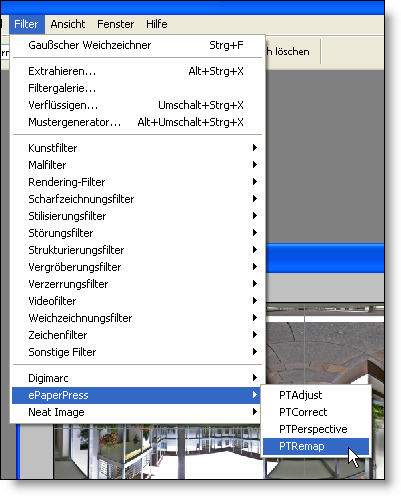
Run Panotools plugin PTremap (Filter > ePaperPress > PTRemap):
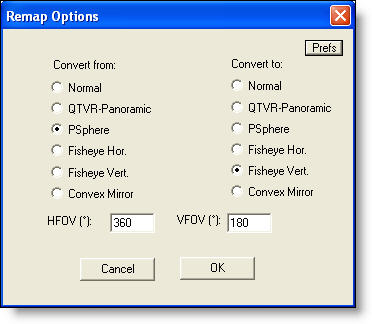
With these settings and values below:
When you hitting button Prefs (Image above) it should look like this:
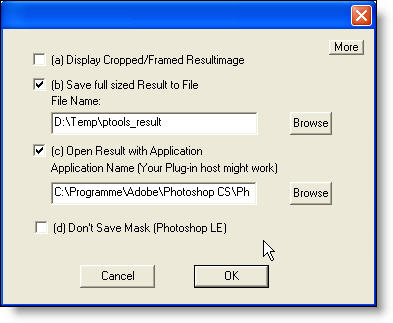
Whith these settings the remap plugin saves the remapped image in a new file.
This is really important because with every transformation of the panorama it
will loose quality. In this step we need only to see the mesure of the white
plate to transform the logo text to the right size.
The remapped view in which you can see the small white circular plate in the middle:
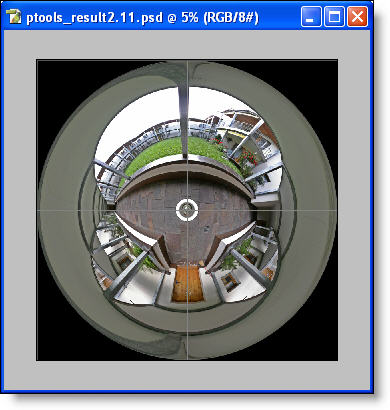
And here with a closer look:
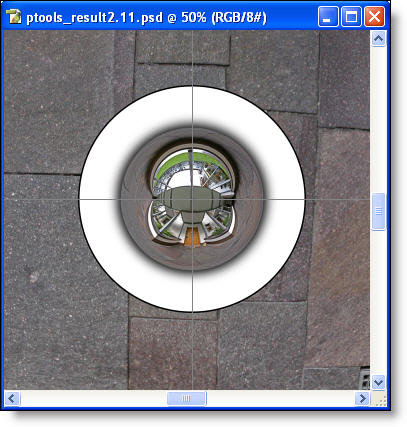
You can see here also the 50 % grid of Photoshop which is a really good helper to align the circular text.
As you can see the crossing of the grid is exactly in the middle of the sphere.
Now it's time to be creative and think about your logo text.
Or you take the way trough an additional method to extract the nadir view.
Remapping nadir with extracting cube faces
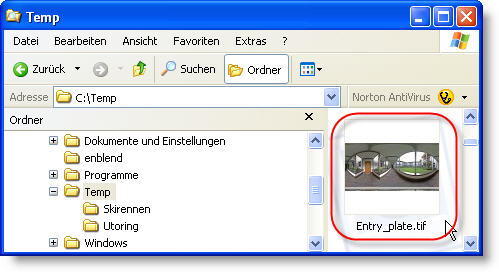
First of all, save panorama with a new name to the folder,
where you also will find the resulting faces from these steps.
In my case I use the name Entry_plate.tif:
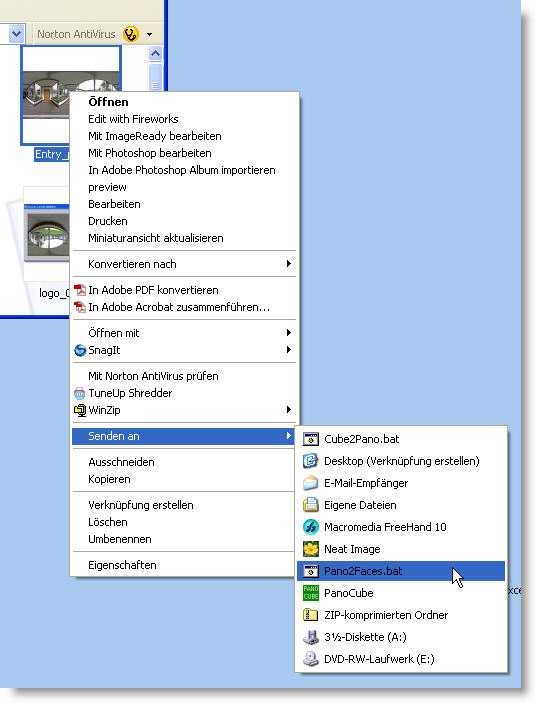
Open Windows Explorer and choose folder where you have saved the modified panorama.
Right click on the file, go to send to... and choose Pano2Faces.bat to
extract six Cube faces out of the equirectangular panorama.
Now a dos window pops up in which you have to define the size of the cubfaces:
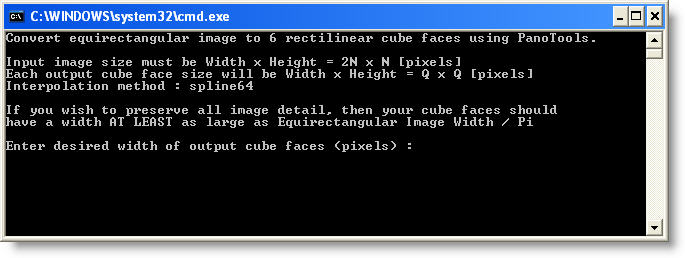
According to the size of the original panorama we have a equirectangular
projection with 6000 pixel width and 3000 pixel height.
- 6000 / 3.14 = 1910 (approx.)
![]()
Hit enter key and the batch file starts processing.....
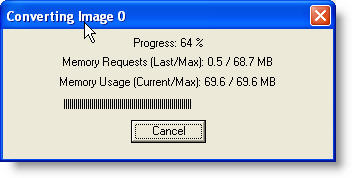
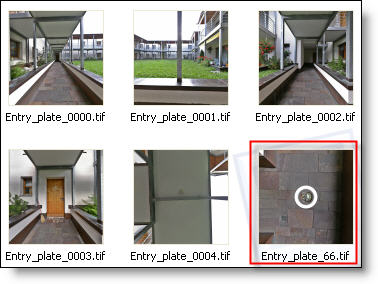
..... and now you can see the six cube faces generated by the batch process.
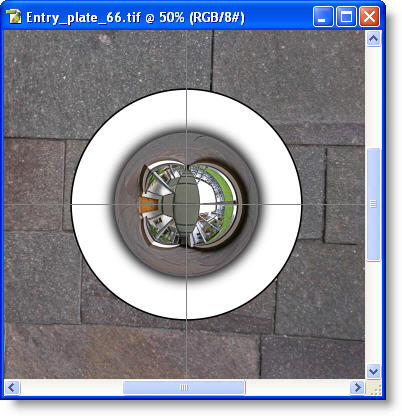
We need only the nadir face with the ending _66. The white text plate is
cleraly visible in the middle of this face.
Zoomed in.....
Inserting text
Plugin method
Open a prepared Photoshop text file to fill in like this (for download of an example click here):
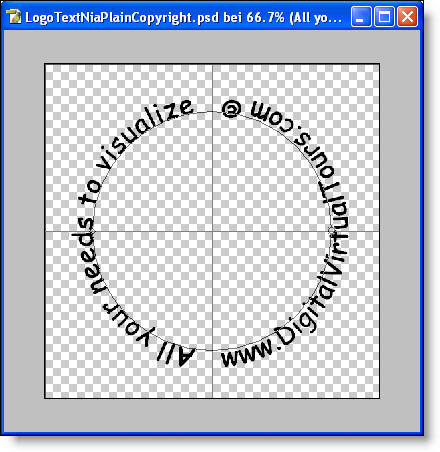
As you can see the logo is flipped 90 degree counter clock wise.
This way the logo gets the right orientation when you remap it back to PSPhere.
Note: After changing the text to your needs you have to flatten these two
text layers to one layer!
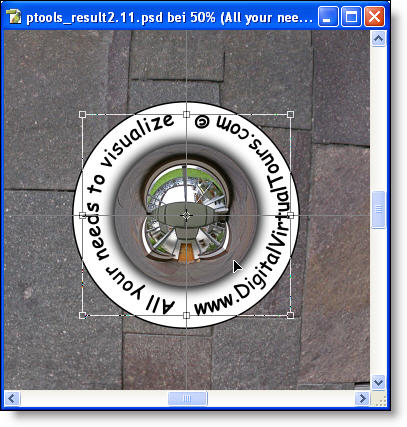
Drag and drop this Photoshop logo file over the file with the nadir view
by holding the shift key to center the text. After this hit Ctrl+T to transform
text layer to the right size. By holding the shift+alt keys and pull on one of
the transform squares you can fit in the text to the white plate.
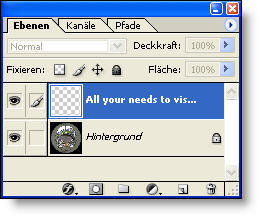
After this text transformations take a look at the layer palette in Photoshop.
Be aware that the text layer is on top and active for the next steps. This way we
we will only remap the text layer.
Cube face method
Inserting a prepared logo text by drag and drop. When you holding the shift key
the text will be centered
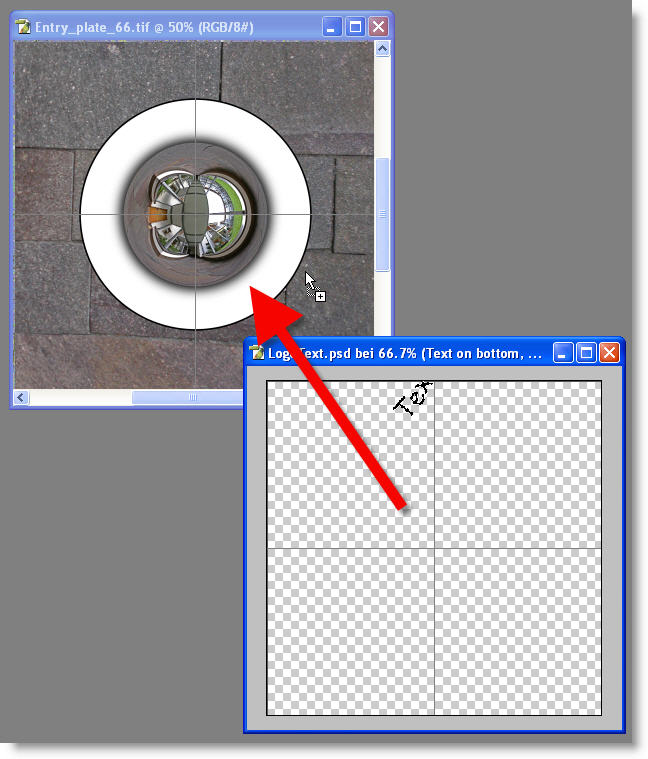
As you can see with this wrokflow with cube faces logo text can be upright.
So if you use the shared logo text sample you have to turn it 90 degree clock wise.
To do so simply press Ctrl+T to transform this layer and turn it by dragging outside
the selection or fill in 90 degree in the menue bar.
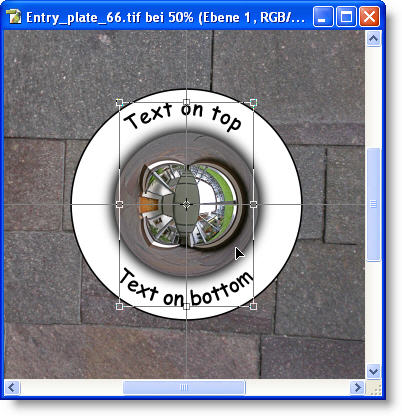
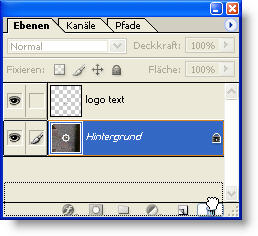
Logo text is positioned so we don't need background layer anymore.
We delete it by darg and drop on the recycle bin as shown below:
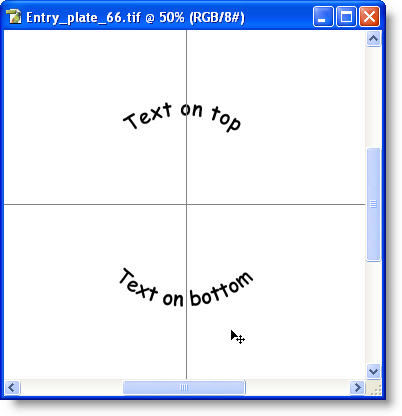
Reduce the existing layer to background.....

..... so you can see a black text with a withe background in the size
(1910 x 1910 pixels)of the original cube face:
Remapping text back to PSPhere
Here you can find also two different ways to remap the logo text back to PSPhere (Eqirectangular projection):
1.) With Panotools Plugins
(These steps have an addiotional transformation to the text because the plugin alter the size of the file while transforming)
2.) With extracting cube faces
Other ways how to insert rectilinear images into a pano are described in Extracting and inserting rectilinear Views
Remapping text back to PSPhere with PanoTools Plugins
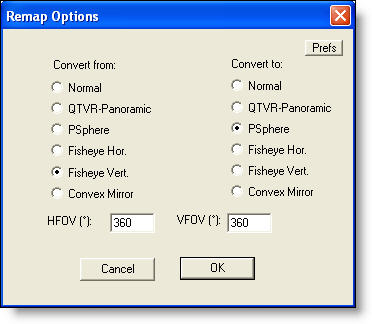
Run Panotools plugin PTremap (Filter > ePaperPress > PTRemap):
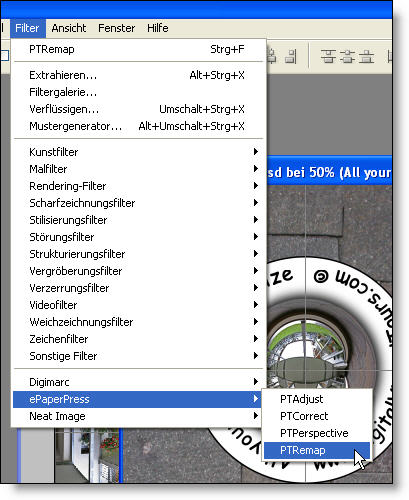
Settings for the re-transformation:
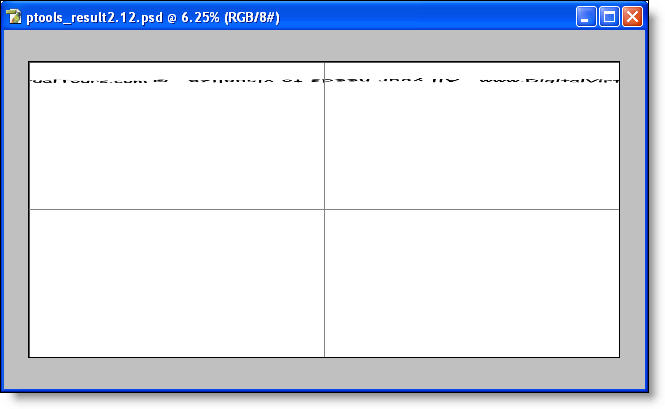
This is the remapped text without the pano as result from the remapping process:
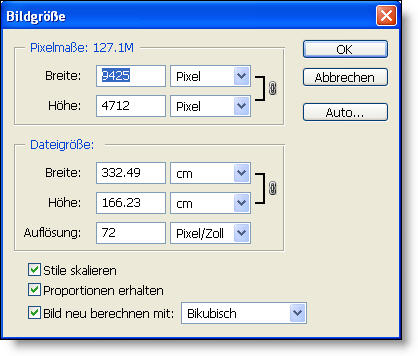
Reduce text file dimensions
Now it's time to remember the initial size of the panorama. In this example
I took a panorama with 6000 x 3000 pixels. When you go to Image > Imagesize...
you can see a slightly different size of thies resulting remap:
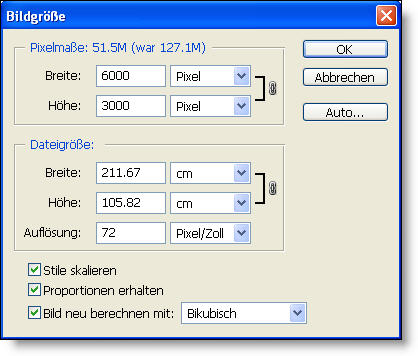
Change the values to the inital size of the panorama you have choosen.
One further step is to flip canvas back by 180 degree.
The text is now on the right position at the bottom:
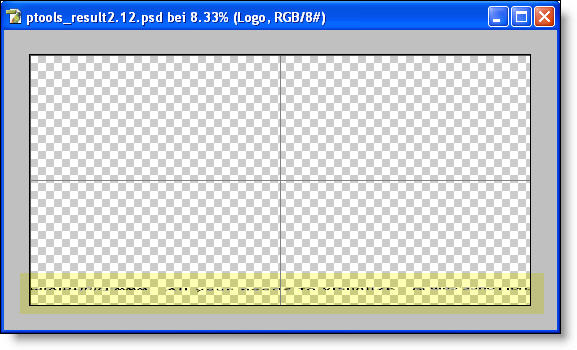
Preparing the text file for further use
The resulting text file should look like below. The only thing you see is the remapped text.
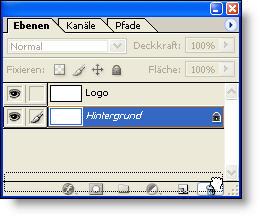
Note: Before you follow with the next steps you have to copy
background layer to a normal layer. Simply drag and drop background layer
over the new layer button at the bottom of the layer palette. After this
you have to delete background layer by drag and drop it over the trash bin also
at the bottom of this palette.
Now you are ready for the next steps...
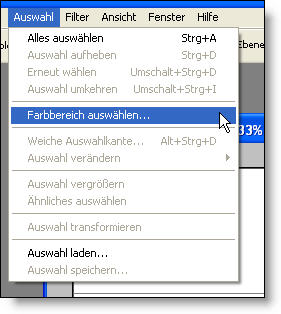
You have to select and delete the white color with the wizzard stick tool or
with the color selection tool under menue selection:
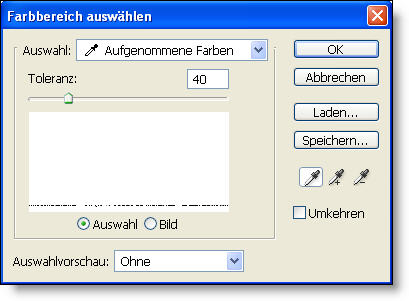
In this tool select the white color with the color picker with a tolerance of 40:
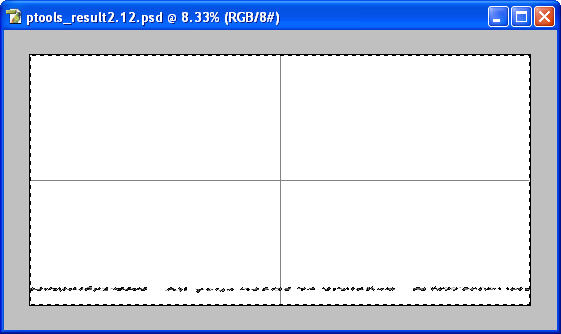
Here you can see how the selected white area looks like.
Now you can just hit the delete button and you are done. Save this file with descriptive name.
(f. e. LogoTextRemapped_6000x3000.psd)
Remapping text back to PSPhere with extracting cube faces
Now you call the second batch file from Eric Gerds (Cube2Pano.bat)
by right click on the nadir face.....
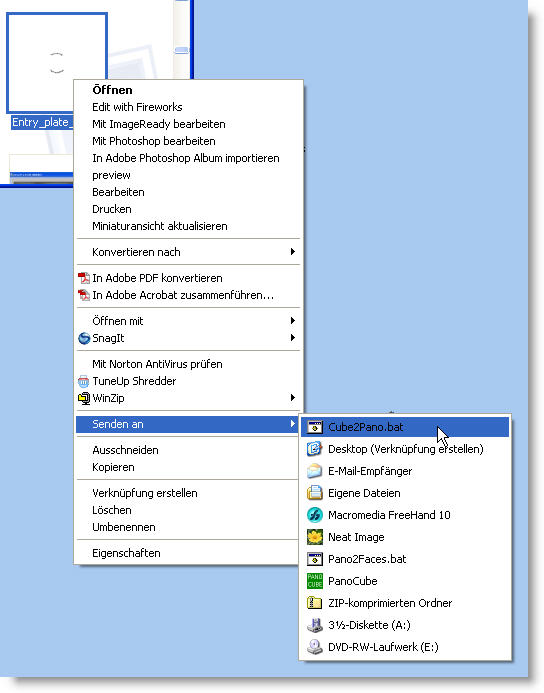
A dos window pops up in which you have to define the width of the
equirectangular pano. In our case this was 6000 pixels. Insert this
value and press enter.....

Converting process with the nadir face only.....
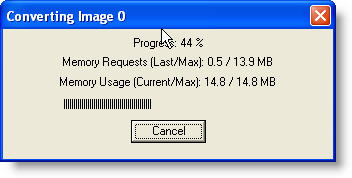
Open the resulting file (Entry_plate_(6000).tif in this case) for further editing.
Choose with wizzard stick tool first the black and second the white area with tolerance
you can see the remapped text on the bottom of this file
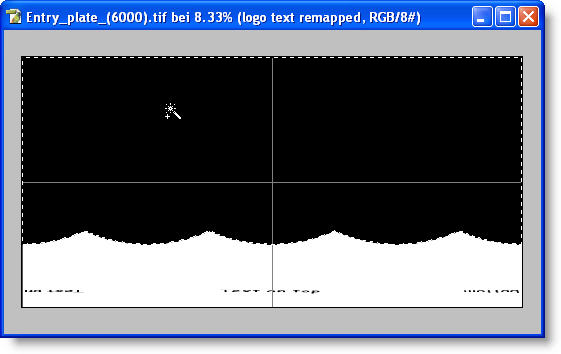
Settings for wizzard stick tool:

After deleting of black and white areas you see the finished text file:
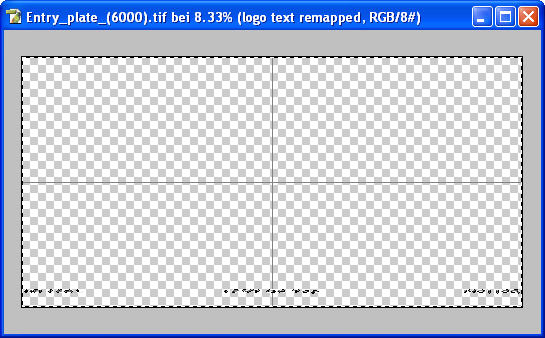
Save this file as Photoshop document (.psd) and you are done

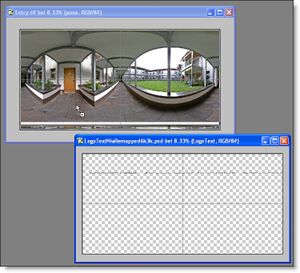
Testing file size and position
Select the produced file with Ctrl+A (In image below: LogoTextNiaRemapped6k3k.psd)
and drag and drop it over the panorama with the white text plate by holding shift key
to center the file.
Flaten the resulting image to background.....
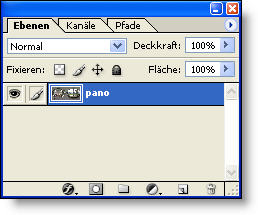
.....and save the panorama with the added text (Ctrl+Shift+S):
Now you can open the saved file in a prefered viewer (f. e. PTEditor)
to see how the nadir looks like. If it looks like this.....
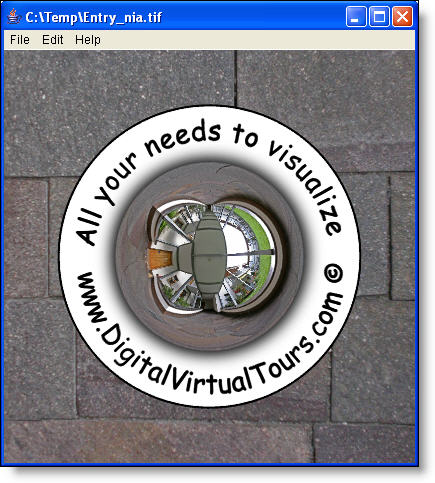
You are done. Otherwise you probably made a mistake by following this tutorial
or you have to modify the size of the text file for a better fit.
How does it work now (The fast way)
Congratulation!!!
Now comes the part to test how fast you can add a nice logo
in the nadir region of your spherical panorama with your own
generated text.
Here we go:
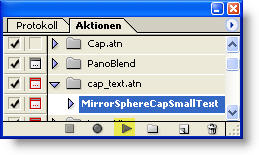
Open Photoshop, choose the action and press the start button:
(For all following steps you will be guided by messages
trough the whole process)
Message No. 1 generated by the action, continue.....
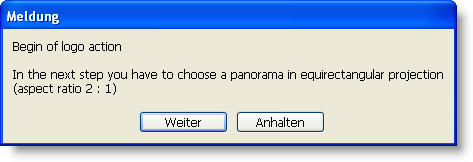
Open a desired panorama with the above parameters:

The action creates in the following steps mirrorball with textplate.
Please wait untill you were asked for more.....
Message No. 2 generated by the action, continue.....
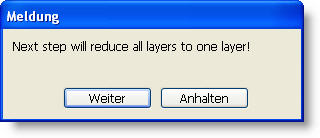
Message No. 3 generated by the action, continue.....
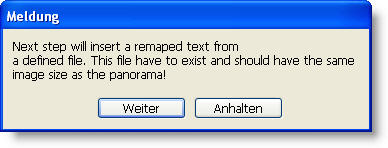
Choose the file with the remapped text which you have created in the tutorial above:

Message No. 4 generated by the action, continue.....
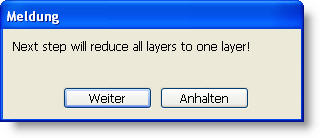
Message No. 5 generated by the action, continue.....
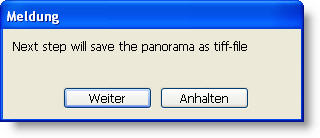
Choose a place where you want to save the modified panorama with the added nadir cap with text:

Since you have created a remapped logo text you are able now to run the
Photoshop action cap_text.atn in one go to produce a panorama with a nice
mirrorball, a white textplate and a logo text of your choice in the nadir region
to hide f. e. the tripod legs.
If you don't like the mirrorball with the white text area, please feel free to modify
the action to your needs. I hope this tutorial explains all the steps to your
needs, otherwise change it or let me know what should be changed.
I'm not native English speaking. Please change wrong words and meanings and take a look
for typos.
Thank you.
-Peter Nyfeler (Pitdavos) April 17, 2005
